23.7 C
Washington
Saturday, July 27, 2024

How to Secure a Dresser to the Wall for Childproofing

Date:

Share:

One child dies every two weeks from tipping furniture, according to the Consumer Products Safety Commission. Most furniture manufacturers include a kit to anchor dressers and shelves to walls, but if you don't have a kit, you can purchase angle brackets at any hardware or home improvement center. Anchoring a dresser is simple, takes less than 30 minutes, and can save a child's life.
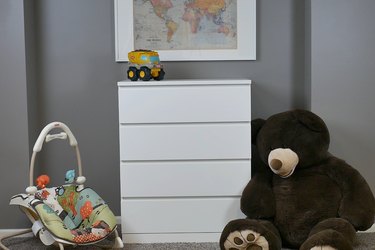
child's room

Video of the Day

Things You’ll Need

  • Provided hardware kit or 2 angle brackets and wood screws

  • Hollow wall anchors, 2

  • 5/8" wood screws, 2

  • Washers, 4

  • Hacksaw

  • Stud finder

  • Portable drill

  • Screwdriver

  • Hammer

Prepare the Dresser

Remove the drawers and clear the area in front of the dresser.
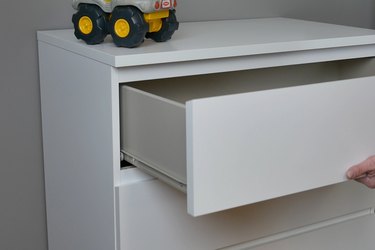
removing drawers

Lay the dresser on its face on the floor — cushion the front with an area rug, if necessary. Pry the nails from the dust cover on the back.
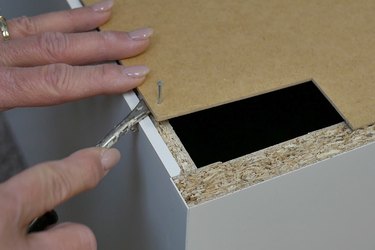
pry nails from the backing

Remove the dust cover and pull any remaining nails.
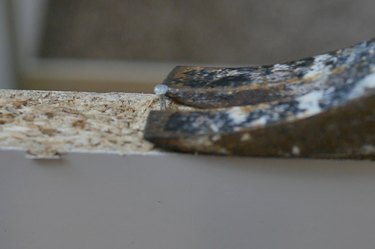
remove remaining nails

Install Brackets Provided by Manufacturer

Line up a bracket with the pre-drilled holes inside the dresser. Drive a screw through a washer, tightly securing the bracket to the top of the dresser.
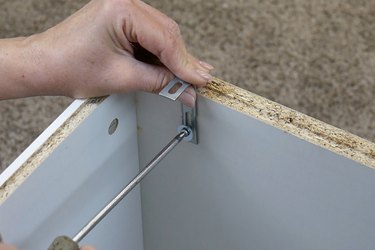
attaching provided bracket

OR Install Angle Brackets Purchased Separately

If you don't have brackets provided by the manufacturer, you can buy angle brackets at any hardware store or home improvement center. Position the brackets on the underside of the dresser top and mark the holes.
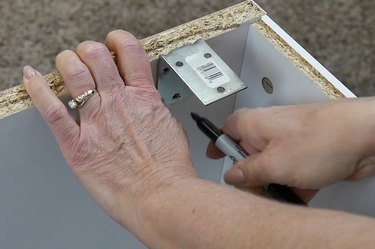
mark the bracket holes

Tip

When purchasing angle brackets for this project, make sure the screws that come with it will not protrude through the top of the dresser. Buy additional screws separately, if necessary.

Drill shallow pilot holes, using a small drill bit. Be very careful not to drill all the way through the wood.
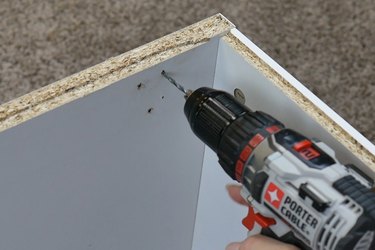
pre-drill holes

Drive wood screws through the bracket and into the top of the dresser. Again — be careful not to drive the screws through the top.
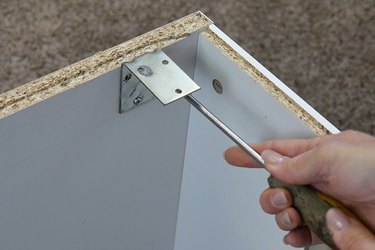
attach purchased brackets

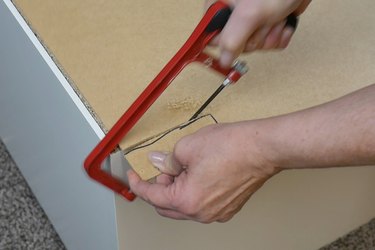
Set the dust cover back in place to see if you need to make a bigger notch to accommodate the bracket. If necessary, mark a cut.
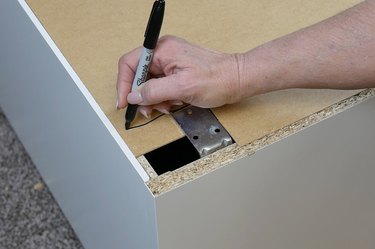
mark cutout

Cut along marked lines.

cut out for bracket

Replace dust cover and tack it back in place.
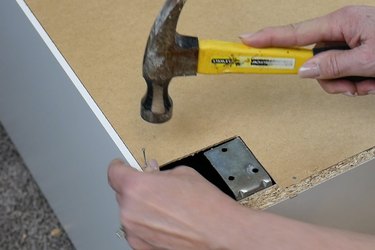
tack backing in place

Anchor the Dresser to the Wall

Now that you have the brackets in place, you're ready to attach the dresser to the wall. Use a stud finder to locate and mark the studs in the area. Tip the dresser up and position it so at least one bracket will be located on a stud.
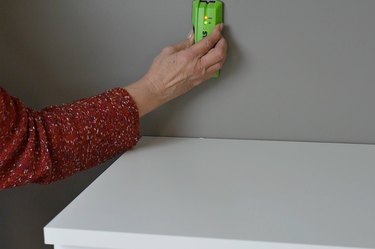
locate the studs

Line a bracket up with the stud and mark the bracket hole.
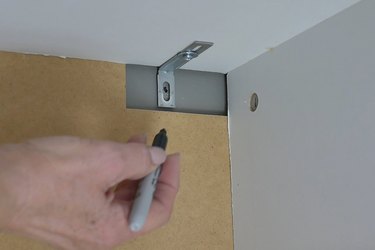
mark anchor locations

Drive wood screws through the bracket and into the stud.
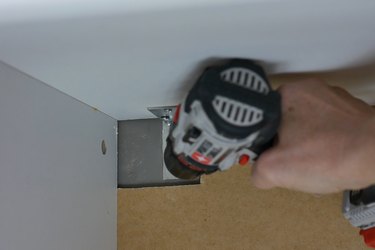
drive screws into studs

OR: if no stud is available in the desired location, use hollow wall anchors. Mark the bracket locations and drill 1/4" holes into the wall.
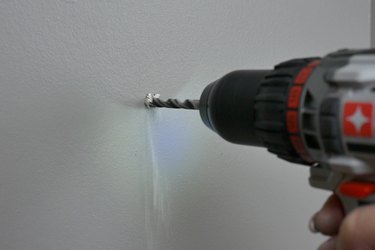
drill through drywall

Tap a hollow wall anchor into each hole.
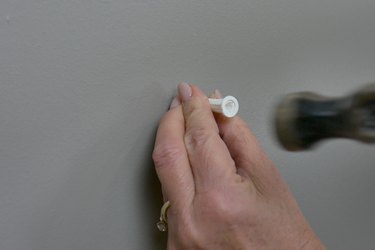
tap in hollow wall anchors

Position the dresser and drive a screw through a washer and the bracket, into the hollow wall anchor. Repeat on the other side.
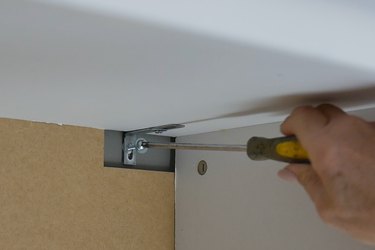
install screw into hollow wall anchor

Finish Up

Pull and shake on the dresser to be sure it's securely attached to the wall.
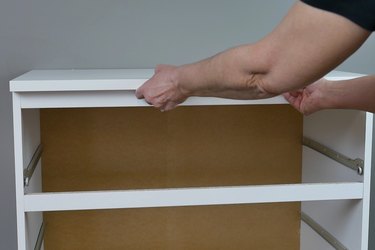
check stability

Replace the drawers.

everything back in place

Subscribe to our magazine

[tds_leads input_placeholder="Email address" btn_horiz_align="content-horiz-center" pp_msg="SSd2ZSUyMHJlYWQlMjBhbmQlMjBhY2NlcHQlMjB0aGUlMjAlM0NhJTIwaHJlZiUzRCUyMiUyMyUyMiUzRVByaXZhY3klMjBQb2xpY3klM0MlMkZhJTNFLg==" msg_composer="" msg_succ_radius="0" display="column" gap="12" input_padd="12px" input_border="0" btn_text="Subscribe Now" pp_check_size="15" pp_check_radius="50" tdc_css="eyJhbGwiOnsibWFyZ2luLWJvdHRvbSI6IjAiLCJkaXNwbGF5IjoiIn19" msg_succ_bg="#12b591" f_msg_font_family="702" f_msg_font_size="13" f_msg_font_spacing="0.5" f_msg_font_weight="400" input_color="#000000" input_place_color="#666666" f_input_font_family="702" f_input_font_size="13" f_input_font_weight="400" f_btn_font_family="702" f_btn_font_transform="uppercase" f_btn_font_size="12" f_btn_font_spacing="0.5" btn_bg="#3894ff" btn_bg_h="#2b78ff" pp_check_border_color="#ffffff" pp_check_border_color_c="#ffffff" pp_check_bg_c="#ffffff" pp_check_square="#2b78ff" pp_check_color="rgba(255,255,255,0.8)" pp_check_color_a="#3894ff" pp_check_color_a_h="#2b78ff" msg_err_radius="0"]

━ more like this

Be a Hero this Halloween

Be a Hero this HalloweenBeing a hero goes beyond dressing up in a costume this Halloween season. Children, families and schools across the country can channel their own superpowers to help deliver lif

Get Away Without Going Away

Get Away Without Going Away5 family staycation ideas that won’t break your budgetFamily vacations are a great way to bond and take a step back from the hectic schedules that accompany everyday life, b

5 Common Questions for Memorializing a Loved One

5 Common Questions for Memorializing a Loved OneOne of the most difficult conversations in a person’s life typically takes place near the end of that life. Planning for a funeral can put an emotional

Top Tips to Transition Back to Work After Baby

Top Tips to Transition Back to Work After BabyMany new parents spend hours preparing for the arrival of a new baby – reading books, seeking professional advice and consulting friends and family. Howev

Making the Back-to-School Transition Easy from Kindergarten to College

Making the Back-to-School Transition Easy from Kindergarten to CollegeIt’s time to get your household organized for another school year and all that comes with it. Whether your child is headed off to
spot_img

LEAVE A REPLY

Please enter your comment!
Please enter your name here