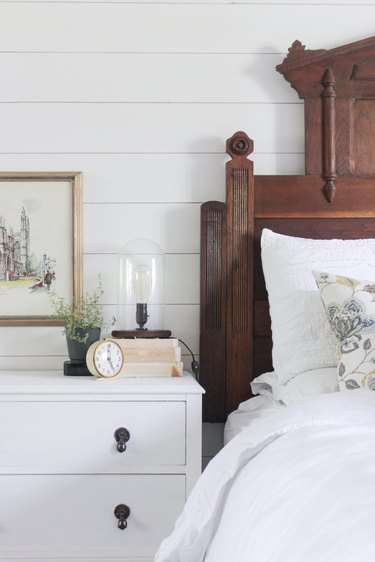
Having a bedroom retreat that represents your style is something that often takes time: linens, artwork, paint colors and accessories all need to come together to form a cozy, cohesive look. Bedside lamps can be a tricky part of the process, as sizes, patterns, and budgets come into play – and that's why it's usually best to keep a timeless aesthetic. This classic industrial wood lamp is a quick project that can add industrial flair to many designs. Follow these few steps in an afternoon, and you can have an illuminating light on your bedside by nightfall.
Video of the Day

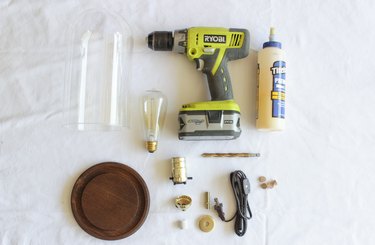
Things You’ll Need
-
Wood round, approximately 7 inches in diameter
-
Cordless drill
-
3/8-inch twist drill bit
-
Wood plugs
-
Wood glue
-
Bottle lamp kit with an 18-gauge lamp cord
-
Screwdriver
-
Glass cloche
-
Edison-style light bulb
-
Painter's tape (optional)
-
Oil-rubbed bronze spray paint (optional)
Tip
Glass cloches can be found at craft stores or at thrift stores as part of vintage dome clocks. Wooden rounds and buttons are best purchased at woodworking stores, or online.
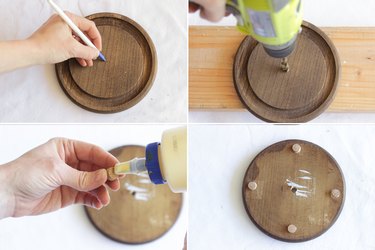
Step 1: Drill the Wooden Base and Attach the Feet
Mark the center of the wooden round, and drill a hole all the way through using a 3/8-inch twist drill bit. Make sure to place the wooden round on top of a scrap piece of wood when drilling. Then, turn the wooden round base over and attach 4 wooden plugs with wood glue, spacing them evenly around the perimeter of the wood round. These will be the 'feet' of the lamp that allows space under the base for an electrical cord.
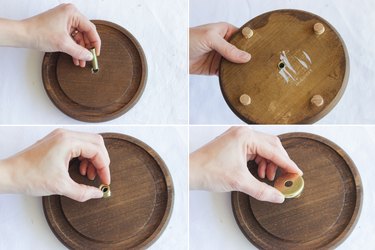
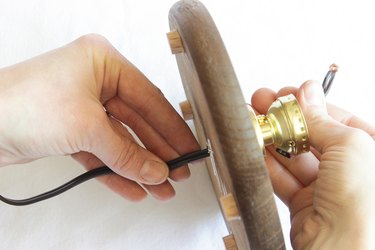
Step 2: Attach the Threaded Nipple
Take out the bottle lamp kit and remove the brass nut that is attached to the threaded nipple. From the top side of the wooden base, screw the threaded nipple into the hole, twisting it until it's about flush with the underside. On the topside, screw the brass nut back onto the threaded nipple until it reaches the wooden base. Place the brass cover on next, covering the nut.
Step 3: Attach the Socket Base and Run the Lamp Cord Through the Nipple
Using a Phillips screwdriver, loosen – but don't remove – the setscrew on the side of the socket base. Attach the socket base to the threaded nipple by screwing it onto the nipple until it's tight.

Run the lamp cord up through the threaded nipple from the bottom, so that the exposed wires are ready to attach to the lamp socket.
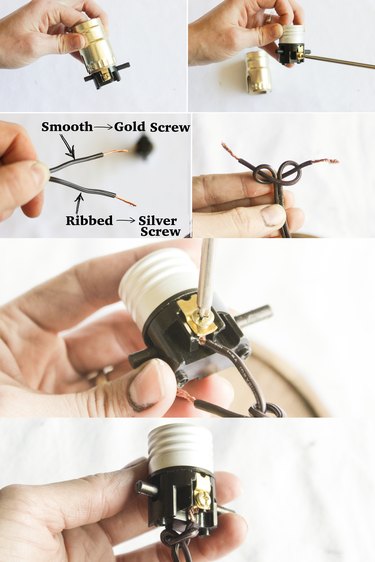
Step 4: Attach the Wires to the Lamp Socket
Remove the shell from the lamp socket and loosen the silver and gold screw terminals mounted on either side of the socket. Gently separate the two halves of the lamp cord, and identify which one is ribbed and which one is smooth. The smooth half is the "hot" wire and will attach to the gold-colored screw; the ribbed wire is the "neutral" wire and will attach to the silver-colored screw.
Tie an underwriter's knot with the ends of the wires, as shown below. Then, twist the bare ends of the wire halves into "C"-shaped loops, and hook them the under the appropriate screw terminals (the ribbed half of the cord to the silver screw, the smooth half of the cord to the gold screw). Tighten the screw terminals down over the bare wires until they are secure. Push the underwriter's knot up close to the socket and tighten it so that it will easily fit into the socket base.
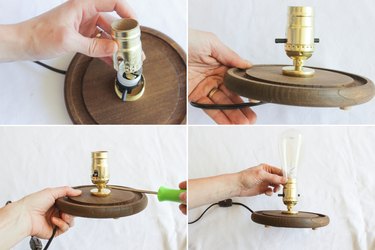
Step 5: Attach the Socket Shell
Push the socket down into the socket base, and after gently pulling the cord taut, slide the shell back over the socket and push down until it clicks into place. Then, attach the socket base to the threaded nipple by tightening the setscrew on the side that was loosened earlier.
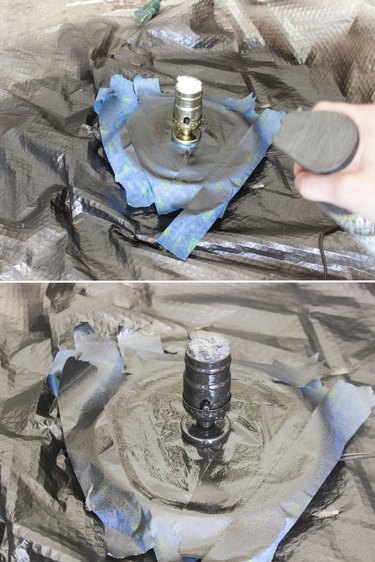
Step 6: Spray Paint the Socket (Optional)
If desired, you can spray paint the socket black. To do this, tape off the wooden base and place crumpled up paper inside the bulb socket. Protect the surrounding area from overspray with plastic, cardboard or a drop cloth, and then give the socket 2 coats of oil-rubbed bronze spray paint designed for metal. Let it dry for 4 to 6 hours.
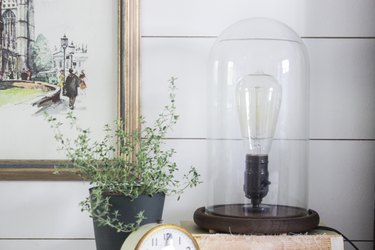
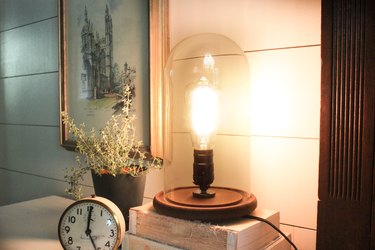
Screw in the Edison-style light bulb, place the glass cloche on top, and plug in the cord to test the switch. When the light shines, you've accomplished a timelessly stylish bedside lamp.

