eHow may earn compensation through affiliate links in this article.
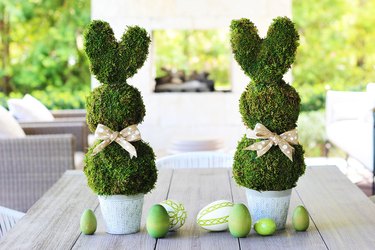
For a springtime centerpiece that is sure to add some cheer to everyone's day, this bunny topiary is a winner. And making it is a hop in the park because you don't need any special materials like foam spheres or wired bunny ears — the body is made of crumpled newspapers and cardboard. So on top of being super cute, the topiary lets you recycle materials that would otherwise go in the garbage.
Video of the Day
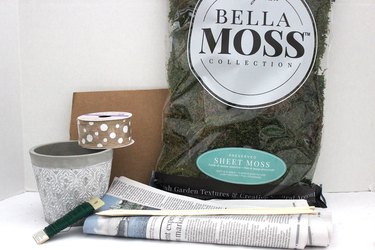
Things You’ll Need
-
Newspapers
-
Masking tape
-
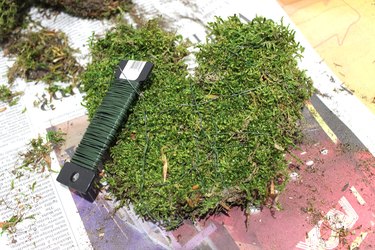
Sheet moss
-
Paddle wire, 24-gauge
-
Cardboard
-
Scissors
-
Wood skewers
-
Planter pot
-
Floral foam or styrofoam
-
Hot glue
-
Ribbon
Step 1: Make Newspaper Spheres
For the bunny's body, we'll need two spheres — one large one for the body and a smaller one for the head. Let's start with the body. Crumple up one double page spread of a newspaper into a ball. Then add another double page spread to that, building onto the ball until you've crumpled six newspaper spreads together. The sphere should be about six inches in diameter.
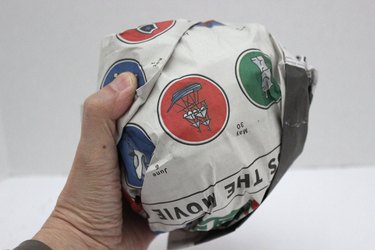
Apply masking tape around the ball to keep it from unraveling.
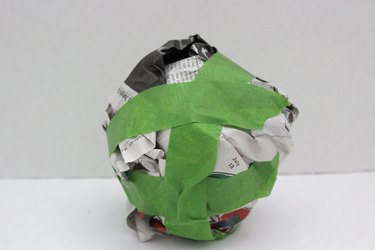
Make a second, smaller sphere using four double page spreads of a newspaper, or eight individual pages. This sphere will be about four inches in diameter.

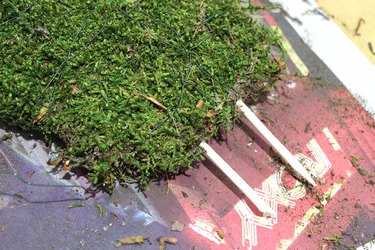
Step 2: Wrap in Moss
For this project, look for sheet moss instead of regular loose moss. Sheet moss comes in larger sections, or sheets, so it is easier to wrap around the newspaper spheres. Place a section of moss around the sphere. Most likely, it won't cover the entire sphere at once.
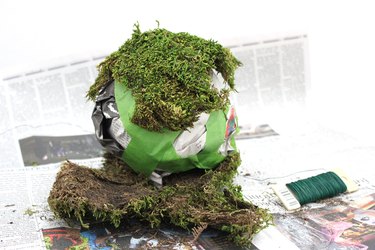
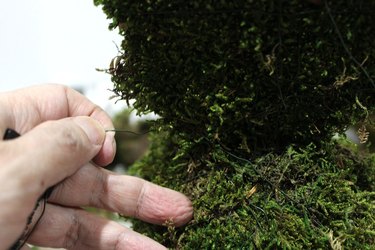
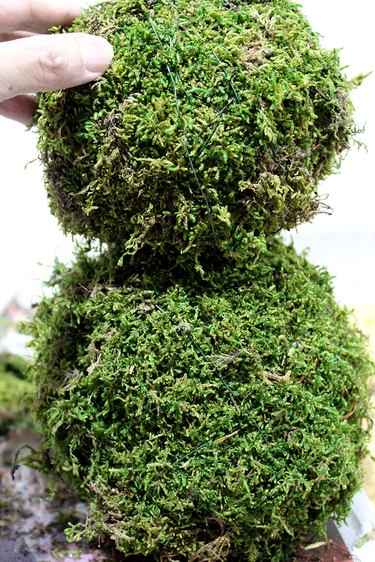
Secure the moss in place by wrapping paddle wire around the moss and sphere. With paddle wire, you don't need to cut the wire until the very end. Just keep unspooling the wire from the paddle as you go.
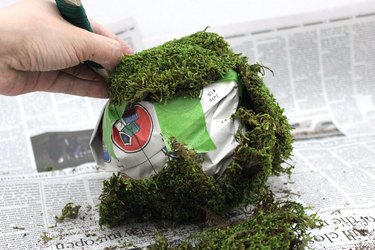
Add more sheet moss to cover the sphere entirely, securing it in place with the paddle wire. Because the wire is green, it's practically invisible. When the ball is completely covered, cut the end of the wire and twist it tight with an adjacent wire on the ball.
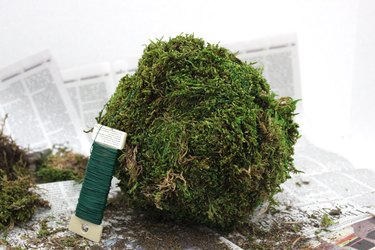
Cover both the small and large newspaper spheres in moss, and you already have the head and body of the bunny.

Step 3: Make the Ears
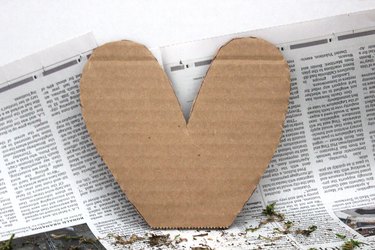
On a piece of cardboard, draw a pair of bunny ears. The easiest way to draw it is to make it look like a heart with the bottom leveled off. Place the drawing on top of your small moss sphere to make sure the ears are the right proportion.
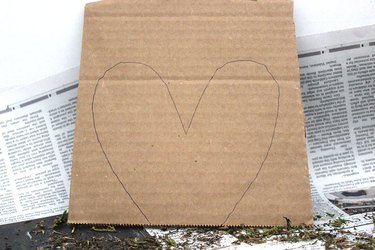
Cut out the bunny ear shape with scissors.
Step 4: Cover Ears With Moss
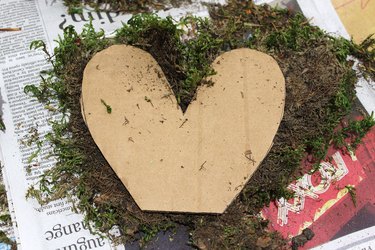
Place the cardboard ears on a piece of sheet moss.
Wrap the moss around the cardboard ears, securing it in place with paddle wire.
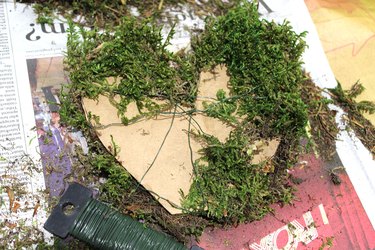
Add more moss to cover the empty spots on the other side, wrapping more paddle wire around the whole thing.
Step 5: Connect the Ears to the Head
Cut two four-inch pieces of a wood skewer with scissors, doing so at an angle to maintain pointy ends. Insert the skewer pieces at the bottom of the ears, either in the corrugated section of the cardboard or between the cardboard and moss.
Insert the skewers into the top of the smaller sphere. The sharp point of the skewers should be able to penetrate through the moss and newspaper of the sphere. If you have trouble, poke holes in the sphere with a hobby knife first.
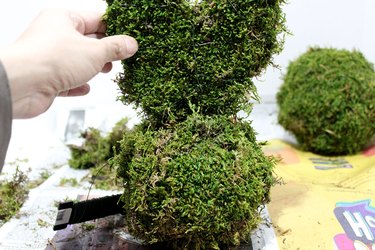
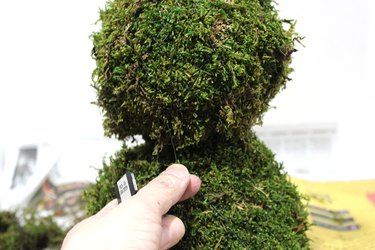
To connect the ears and the head securely, it's our old friend paddle wire to the rescue. Go back and forth from the top of the ears to the bottom of the ball several times with the wire. You don't need to cut the wire when you're done. You'll be using more of it in the next step.
Step 6: Connect the Head to the Body
Cut another two four-inch sections of a wood skewer, and insert them at the bottom of the head. Again, if you have trouble, poke holes with a hobby knife first.
Push the skewers into the top of the larger sphere (the body).
Now take the paddle wire and wrap it around both the head and the body several times. You can even go up to the ears again and wrap the wire around the ears, head and body all together.
Tip
The key to wiring the bunny is to use a criss-cross motion with the wire so it's like a figure-eight, mimicking the shape of the bunny. This way, the wire will remain hidden.
When you're done wiring the sections of the bunny together, flip the bunny upside down to make sure it's all secure.

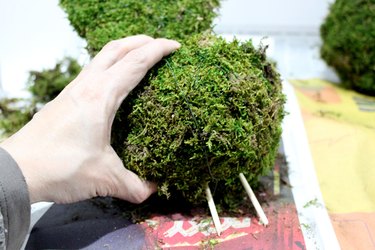
Step 7: Attach Bunny to a Pot
Select a pot with a diameter that is smaller than that of the bunny's body. Insert a piece of floral foam or styrofoam into the pot. Squeeze it in there so it doesn't move around. Then apply hot glue around the rim of the pot.

Cut a five-inch section of a wood skewer and insert it into the bottom of the bunny. This skewer will go into the foam that's in the pot, anchoring the bunny in place.

Insert the skewer into the foam while pressing the bottom of the bunny against the hot glue that is on the rim of the pot. Hold it in place until the hot glue sets and hardens.

Step 8: Manicure the Bunny
Give your bunny a polished look by giving the Edward Scissorhands treatment to the extraneous pieces of moss around the edges.

Step 9: Tie a Ribbon
Tie a bow around the neck of the bunny to up the cuteness factor even more.

While these topiaries are perfect for springtime, they would also be festive at baby showers and kids' birthday parties all year round. After all, everybunny loves bunnies.


