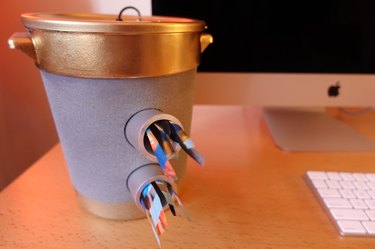
Summer's great, but if you don't have an AC unit in your work/home office, good luck trying to get any work done. What to do? Why not have your computer work for YOU to keep you cool? Based on one of eHow's most popular projects, this nifty DIY Portable Bucket Air Conditioner, we've come up with a mini desktop version using a USB-powered fan, some food storage containers, and PVC pipe. So stop sweltering and start DIYing!
Things You’ll Need
-
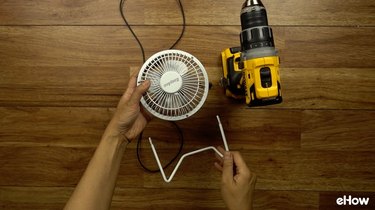
USB mini fan with 4-inch blades and removable stand
-
2 styrofoam food containers with opening large enough for the fan to sit atop (32 oz. ones worked perfectly for us). Styrofoam helps keeps ice frozen longer.
-
Plastic container with lid that fits styrofoam containers (we used a 4-quart food storage container). Clear plastic works best, but any will do.
-
Utility knife
-
Masking tape
-
Power drill/driver (optional, but recommended)
-
1 1/4 -or- 1 1/2 inch hole saw drill bit (optional, but recommended)
-
2 PVC pipes 2 1/2 inches in length and with the same diameter as your hole saw
-
2 rubber bands
-
Plastic sandwich bag filled with ice.

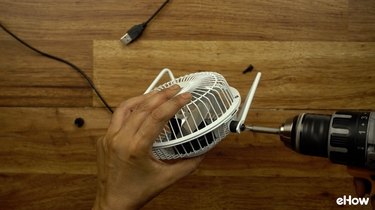
Step 1: Remove Fan Stand
Use your driver to remove the stand from the fan so that it sits inside your containers without any obstruction.
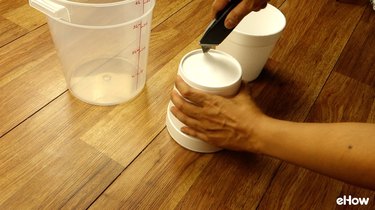
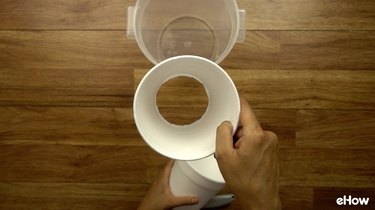
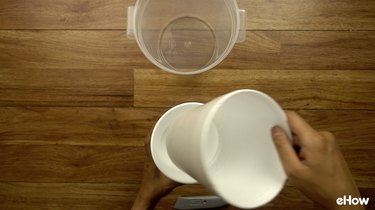
Step 2: Prepare Inner Insulated Ice Container
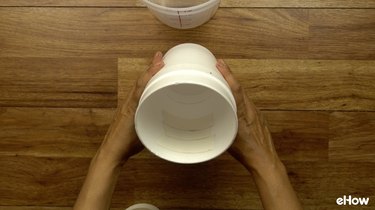
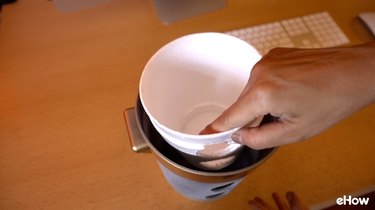
You're going to use your styrofoam containers to create a double-walled inner container where your ice will be stored. To start, use your utility knife to cut out the bottom of one of the containers, then place that container inside the other. Cutting out the bottom will give you more room for ice.
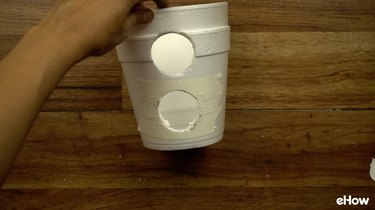
Step 3: Cut Holes in Inner Container for Discharge Tubes
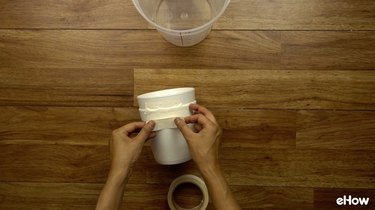
If using a hole saw, you'll get a cleaner cut through your styrofoam containers if you stabilize the area to be cut with masking tape. If not using a hole saw, see the tip box at the end of this step.
Apply tape to the inside and outside of the styrofoam walls where you will cut through.
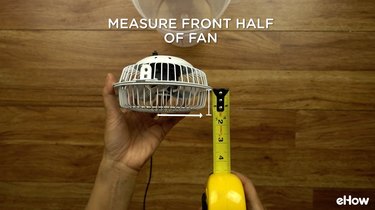
BEFORE you cut, you'll first need to mark where your hole should go. You need to ensure that the hole is placed beneath the fan or else you won't be able to insert the PVC tubes into the styrofoam container. To do this, measure the front half of the fan as shown below. This is the portion of the fan that will sit inside the inner container.
Take this measurement, and use it to mark a dot down from the top edge of the styrofoam container.
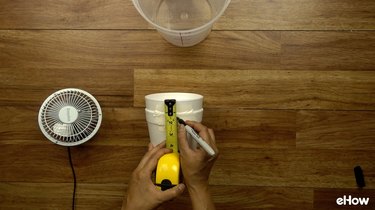
Ensure that you cut your hole right below this mark.
Now, with your hole saw set in REVERSE, drill a hole through the styrofoam at high speed. Drilling in reverse at high speed will give you a cleaner cut through the foam.
Now, repeat the hole drilling process to create another hole either below the first hole or beside it — depending on personal preference as well as the size of your containers.
Tip
If you don't have a hole saw, you can use a utility knife to cut a hole through your styrofoam containers. You'll just need to find an outer container made from a thinner, softer plastic that can be cleanly and easily cut with a utility knife or a pair of scissors. A couple recommendations: reuse an empty, jumbo-sized food container from a big box store or pick up a small, disposable paint bucket from a hardware store.
Step 4: Cut Holes in Outer Container for Discharge Tubes
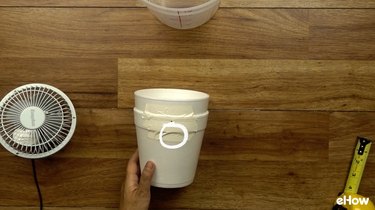
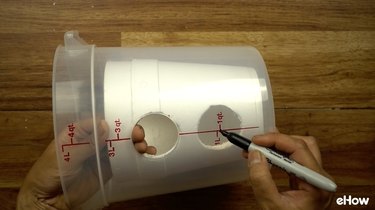
It's now time to cut holes in the outer containers, making sure that the holes align with those in your inner container. If your container is transparent, place the foam cups inside and mark the placement of the holes you'll need to cut, as shown below. If your outer container isn't transparent, measure the holes on the styrofoam container and transfer those measurements to the plastic container.
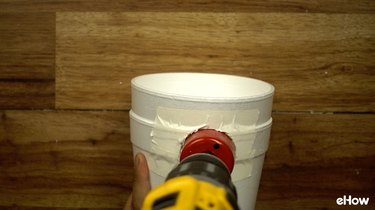
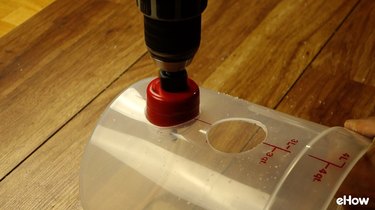
Once again, drill your holes in REVERSE. Not only will reverse-cutting give you a cleaner cut through plastic, it will prevent the hole saw teeth from grabbing the plastic (which will heat up from the speed of the drill) and spinning the container around and/or twisting your wrist! (If not using a hole saw, please see tip box in step 3.)
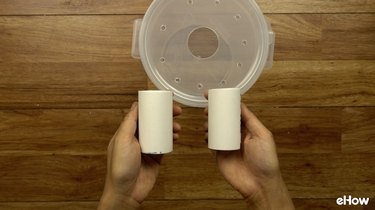
Step 5: Cut Lid
If your outer container fits the entirety of the fan (like ours does), you'll need to cut a hole allowing you to pass your USB cable through, as well as additional holes that will allow your fan to draw in ambient air, as shown below. If your container is smaller and the fan doesn't fit inside completely, see the tip box beneath the photo.

Tip
If your fan doesn't fit completely inside the container, you'll need to cut a larger hole in the lid that will allow the fan to sit halfway inside, face down, as shown in steps 2 and 3 of eHow's DIY Portable Bucket Air Conditioner tutorial.
Step 6: Make it Cute! (Optional)
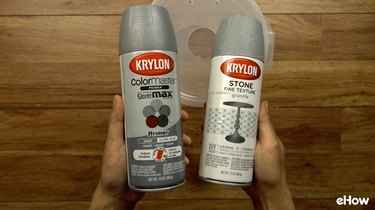
Left as is, your AC unit will keep you cool, but it won't be much to look at. Get creative and gussy it up with some primer, paint, decoupage, etc.! If you opt to decorate (yay!) make sure to do the outer container, the lid, and both of the PVC pipes.
We primed all the pieces with a spray primer first, then used a textured faux stone paint for the outer container. For the lid and PVC tubes, we used metallic paint in gold and silver. If painting, we recommend that you let the paint dry overnight before proceeding to the next step.
Step 7: Assemble the Unit
Insert the inner container into the outer, making sure to align the holes.
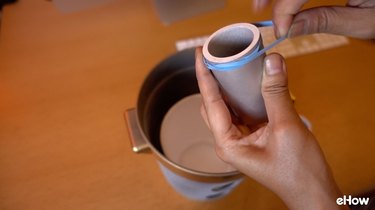
Before inserting the PVC discharge tubes through the holes, put a rubber band on the end of each tube. This will keep the tube in place as well as create a tighter air seal between the tube and styrofoam container.


Insert a sandwich bag with ice into the inner container.


Place the fan face down into the top of the inner container. Try to get as snug a fit as possible.

Pass the USB cable through the opening you made in the lid.

Finally, snap the lid shut. (If your container is not large enough to fit the entire fan, see the tip box in step 3).

As you can see, our fan's power switch is conveniently placed next to the power cord, so the opening we made for the cord also allowed us to switch the unit on and off without having to remove the lid. If your switch is elsewhere on the back of the fan, either create a separate opening for the switch, or lift the lid in order to turn on and off.

Plug your DIY air conditioner into your USB port, power on, and enjoy!

Tip
If you find that your unit isn't generating enough air, try cutting additional and/or bigger holes in the top of your lid. It could be that your fan isn't pulling enough ambient air into the unit. Also, check to see if the ice bag is obstructing air flow into the tubes. If so, rearrange the ice to clear the path through the tubes, or remove some ice from the bag to create more room.

