When you're thirsty, there's nothing as refreshing as an ice-cold glass of lemonade, and when you're feeling crafty, these lemonade candles will quench your thirst for creativity. The lemonade part is made out of gel wax, but it's the drinking straw, ice cubes and lemon slices – also wax – that take these candles to the next level. They would be perfect decorations for spring and summer parties as well as cheery gifts for the sunny people in your life.

Video of the Day
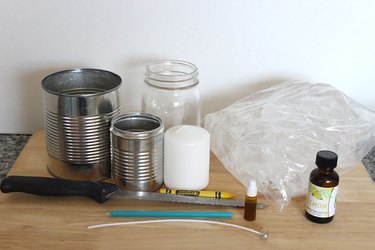
Things You’ll Need
-
Gel wax
-
Small pot
-
Square silicone mold
-
Knife
-
12-ounce plastic cup
-
Plain white wax candle (unscented)
-
Yellow crayon
-
Tin can
-
Wood skewer
-
White Posca paint marker
-
1-pint Mason jar
-
Pre-tabbed candle wick
-
Empty pen tube
-
Glue dot
-
Clothespins
-
Yellow liquid dye
-
Lemon fragrance (formulated for candles)
-
Tall birthday candle
Making the Ice Cubes
Step 1: Melt the Gel Wax
Break the gel wax into small chunks and place them in a small pot.
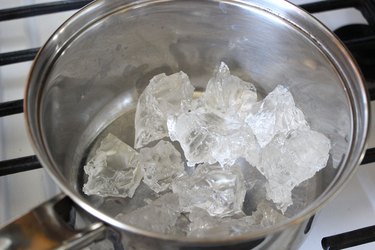
Heat the pot on low heat to melt the wax. Expect the wax to melt very slowly. Don't rush it by turning up the heat. Watch the stove to make sure it doesn't burn.
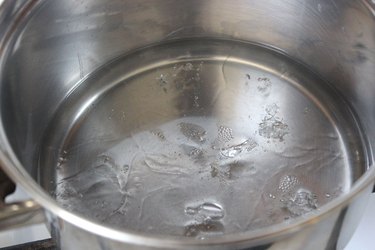
Step 2: Pour Wax Into the Mold
Pour the melted gel wax into a square silicone mold. I used squares that were 1.5 inches, but you can use any size you find since the wax squares will be cut into smaller cubes anyway. Let the wax harden for at least two hours.
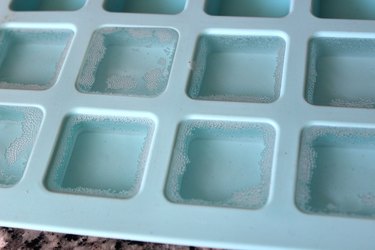
When the wax has cooled and solidified, you can pop the squares out of the mold.
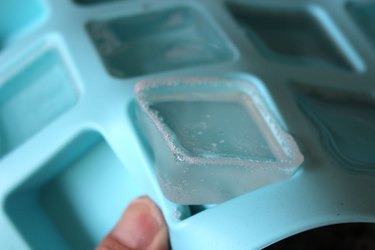
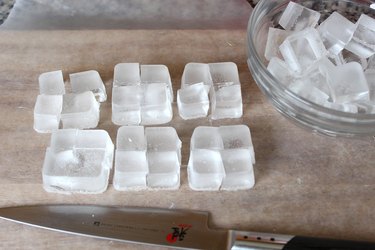
Step 3: Cut the Wax Into Cubes
Cut the wax squares into smaller cubes to make the ice cubes.
Making the Lemon Slices
Step 1: Make a Mold
The perfect mold for a lemon slice is the bottom of a 12-ounce plastic cup. To make it easier to work with, cut off the top of the plastic cup, leaving about an inch at the bottom.

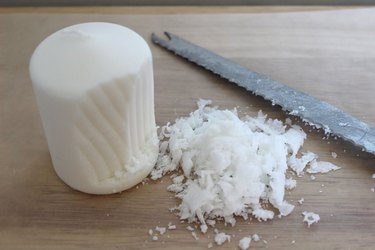
Step 2: Shave Some Candle Wax
For the lemon slice, you need opaque white candle wax rather than the transparent gel wax. The easiest way to get some white wax is to shave the sides of a new white candle. Make sure it is unscented.
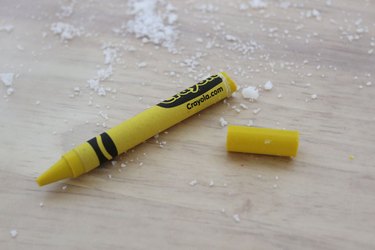
Step 3: Cut Up a Yellow Crayon
Peel the paper wrapper off a yellow crayon and cut the crayon into small pieces. The crayon will act as the candle dye for the white wax.
Step 4: Melt the Wax
Place the white wax and about an inch of crayon pieces inside a clean, dry tin can.
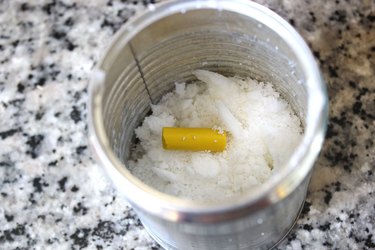
You'll melt the wax using a double-boiler system. Pour just enough water into a small pot so that the tin can holding the wax sits in the pot without floating. Set the burner to low. The wax melts quite rapidly, so keep an eye on it and stir it with a wood skewer. If the color is not as saturated as you'd like, add more pieces of yellow crayon.
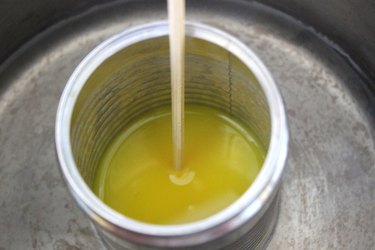
Step 5: Pour the Wax Into the Mold
Pour about 1/4 inch of the melted yellow wax into the plastic cup mold. Let it cool and harden for about an hour.
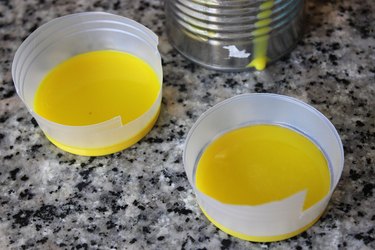
When solidified, the yellow circle will pop out. If the bottom of your plastic cup had embossing, such as the plastic recycling number in a triangle, this embossing will also appear on the wax. You can remove it by rubbing it off with your fingertips or just leave it on. No one will notice.

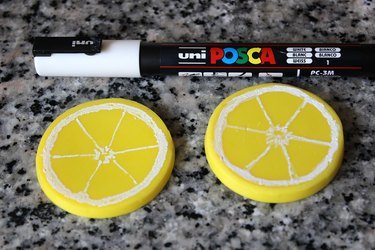
Step 6: Draw the Rind and Sections
To make the lemon slices look realistic, use a white Posca paint marker to draw a white circle around the perimeter of the yellow circle to make the rind. Then, outline the sections by drawing six white lines like the spokes of a wheel. Include a white middle.
Regular acrylic paint does not adhere to wax very well, but the white paint marker works perfectly. Also, the Posca brand marker does not contain any alcohol or solvents, which is a good thing since the painted lemon slice will be part of a candle. (While this lemonade candle will most likely be purely decorative and never be lit, it's better to be safe just in case.)
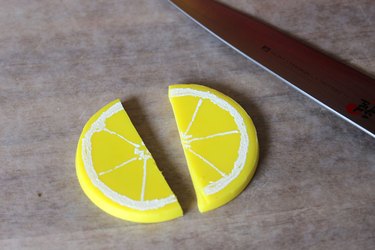
Step 7: Cut the Slices in Half
Dip a knife in hot water and cut each lemon slice in half. Usually, just by cutting into the slice a little bit, it will snap in half with a clean break.
Preparing the Mason Jar
While you can use a regular glass, a Mason jar adds considerable charm to this candle.
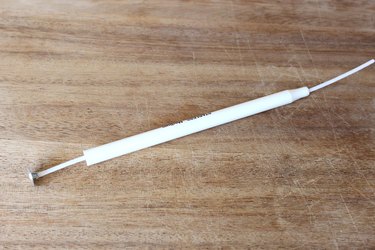
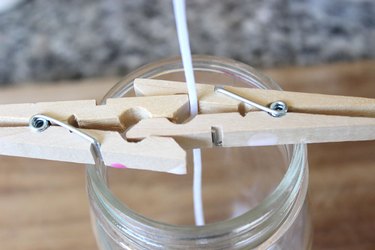
Step 1: Attach the Wick
Attaching a candle wick to the bottom of the Mason jar can be a challenge when the opening is so narrow. Using the empty tube of a pen does the trick. Thread a pre-tabbed wick that is higher than the Mason jar through the empty pen tube.
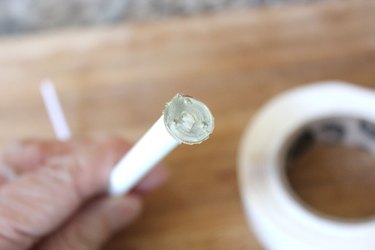
Press a glue dot to the bottom of the metal tab.
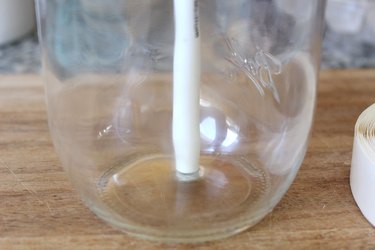
Guide the wick into the Mason jar with the pen tube, centering it at the bottom. Then, press down with the pen tube to adhere the wick to the bottom of the Mason jar. Remove the pen tube.
Center the wick through the opening of two interlocking clothespins.
Mixing the "Lemonade"
Step 1: Melt the Gel Wax
Break apart more chunks of gel wax and place them in a small pot. Each candle uses about a pound of gel wax, including the wax that makes the ice cubes.

Melt slowly over low heat, stirring occasionally.

Step 2: Dye the Wax
Add two to three drops of yellow liquid dye to the melted wax. Keep in mind that lemonade is usually a very pale yellow, so very little dye is needed.

Step 3: Add Lemon Fragrance
Mix 30 to 40 drops of lemon fragrance with the melted wax. Wave your hand above the top of the pot to smell the fragrance. Add more or less fragrance as desired. Be sure to purchase fragrance that is specifically formulated for candles.

Step 4: Pour the Wax Into the Jar
Pour the melted wax into the Mason jar, filling it to the three-quarter mark. Be sure to leave room for the ice cubes.

The Finishing Touches
Step 1: Add the Ice Cubes
After the wax has cooled for about 15 minutes (it should still be hot), test the wax by dropping a wax ice cube into the Mason jar. If it sinks into the wax a little bit without melting, it's time to add the rest of the wax ice cubes. They will rest on top of the lemonade wax, with some melting into the lemonade just like real ice cubes do.

Step 2: Add the Straw
For the straw, you don't want to use an actual plastic or paper straw. Again, we're thinking about safety even though this decorative candle will probably never be lit. The perfect stand-in for a straw is a 5 1/2-inch-tall birthday candle. It's wax. It's a candle. It will fit right in.

Feel the sides of the Mason jar. After about an hour, it should be much cooler to the touch but still a little warm. Now is the time to insert the straw. (If you try to insert the straw when the lemonade wax is hot, the straw will melt.) Make sure the flat end of the straw is on top.

Step 3: Add the Lemon Slices
Insert one lemon slice into the lemonade wax so it is partially submerged. Again, the lemonade wax needs to be slightly cooled to do this, as the hot wax will melt the lemon slice. Push aside a few of the ice cubes if necessary.

Rest a second lemon slice on the rim of the Mason jar, wedging it in place between two ice cubes. Now, this is looking like a proper glass of (fake) lemonade.

Cut off any excess wicks and your faux lemonade candles are finished and ready to be admired. You deserve a real glass of lemonade now. Store-bought is perfectly fine. You've done enough for today.


