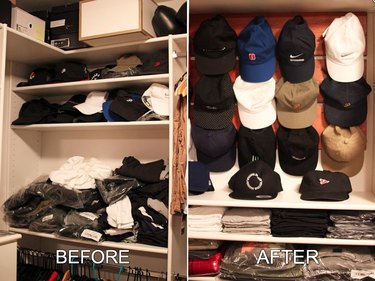
My boyfriend has a ton of hats that our shelving just can't seem to hold anymore. He doesn't even remember what he has because he can't see them all when they're piled up and stuffed on the shelf! I cleared out a little space on our closet wall and solved the problem with this easy-to-follow DIY hat organizer tutorial.
Video of the Day
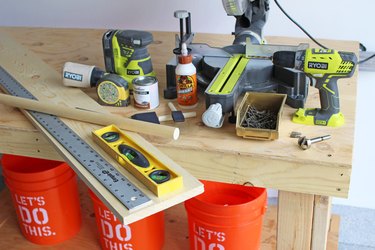
Things You’ll Need
-
1" x 6" x 72" beam
-
3/4" wooden dowel
-
Miter saw
-
Orbital sander or sandpaper
-
Power drill
-
1" Forstner drill bit
-
Level
-
Ruler
-
Pencil
-
Wood glue
-
Stain or paint of choice
-
Sealant
-
Measuring tape
-
Nail gun (optional)
Tip
Feel free to alter the measurements to fit the length of your space! This DIY tutorial is for a 36-inch long hat rack.
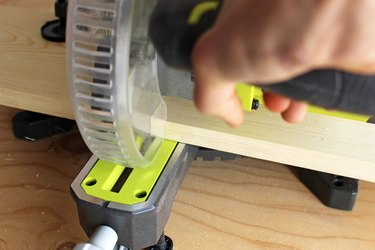
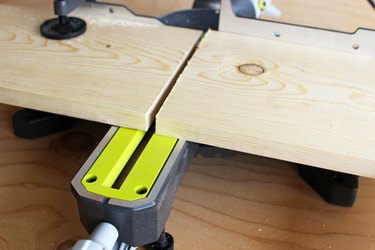
Step 1: Cut Your Wood
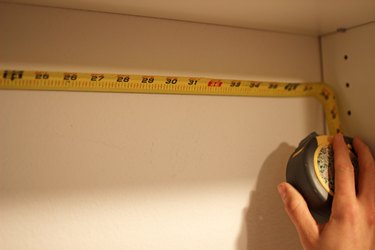
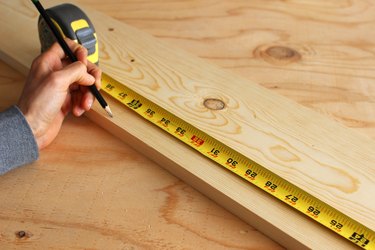
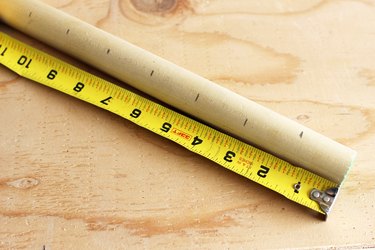
Measure the wall space you plan to use to determine how large your hat rack will be. Mine allowed for a 36-inch long hat rack.
Cut your 1" x 6" beam down to size.
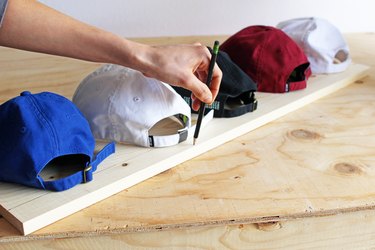
Step 2: Measure Placement for Hooks
Mark 1 1/2 inches from the top (longer side) of the 36-inch piece of wood.
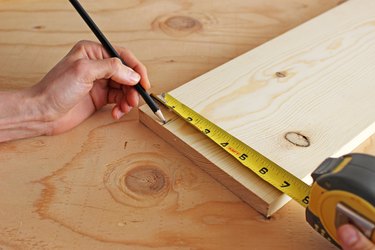
Take your long ruler and make a mark across the piece of wood as a guideline for where you want your hats to hang.

Place hats side by side along the piece of wood, spacing them out to your personal preference. Then mark each spot on the wood.

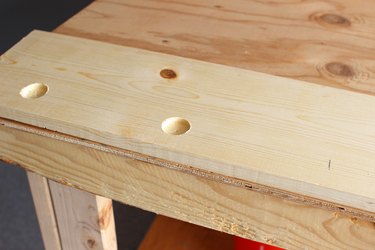
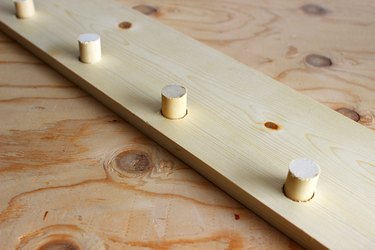
Step 3: Drill Your Holes
Using a Forstner drill bit (I used 1-inch), drill holes for the pegs where you made the marks for the hats. Your drill bit size should be a little bit bigger than your dowel's diameter. This way, the dowel will fit right on in!
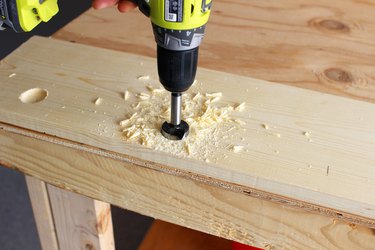
Make sure to not go all the way through the wood. Take it nice and slow when using this drill bit–it doesn't take much power to push this puppy all the way through, and you do not want that.
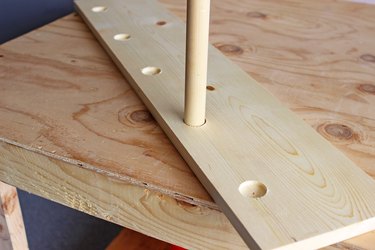
Step 4: Cut Down Your Dowel
Use your miter saw to cut your dowel into pieces about 1 1/2 inches long, creating the pegs (hooks) for the hats.
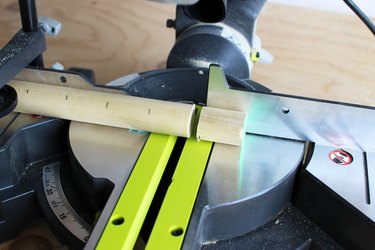
Place the dowel pieces inside the holes you drilled to make sure they fit properly.

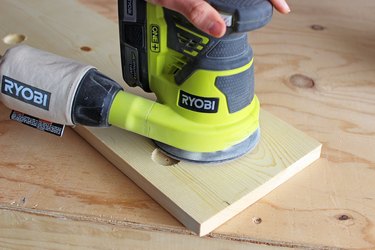
Step 5: Sand Your Wood
Use 120 grit sandpaper and sand down your wood. For the holes, tape some sandpaper to the end of a dowel and sand the inside.
For the beam, I used my orbital sander.
For the pegs, I sanded them by hand.

Step 6: Stain or Paint Your Wood
Before putting it all together, stain the wood using your choice of color (I used American Walnut) to give it a little life.


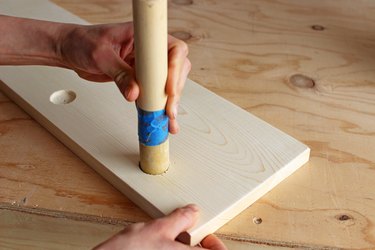
Step 7: Attach Wood Pegs (Hooks)
Lay out your wood beams on a flat surface and add some wood glue to each drill hole.

Place your pegs into each hole.


Flip the beam around and secure the pegs by brad nailing through the back of the board into each peg.


Step 8: Add Sealant
Add a weather proofing sealant (spray paint version) to give it a glossy finish and protect it from humidity.


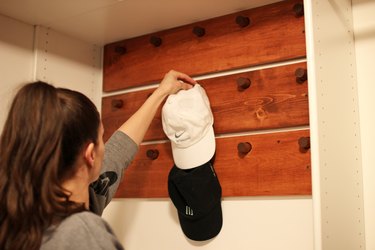
Step 9: Hang and Organize
Use a power drill, screws and a level to hang the hat rack up on the wall.


I couldn't believe how simple this DIY hat organizer was to make! The entire build from start to finish only took me 4 hours, so it was perfect for a weekend project. Happy DIY'ing!


