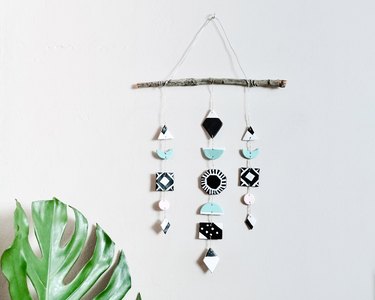
If you love hand-crafted, retro-inspired wall hangings as much as we do, just imagine how much you'd love decorating your home with a one-of-a-kind, geometric polymer clay wall hanging that you actually made with your own hands. Are you picturing it? Awesome. Now stop imagining and start making. And if you're a polymer clay newbie, don't be intimidated! Just follow our step-by-step DIY and we assure you that this surprisingly simple project will yield stunning results.
Video of the Day
eHow may earn compensation through affiliate links in this tutorial.
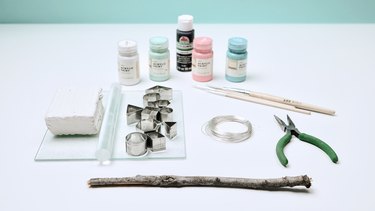
Things You’ll Need
-
Polymer clay
-
Acrylic roller and board
-
Cookie and/or fondant cutters in desired shapes
-
Parchment paper or aluminum foil (optional)
-
Glass baking dish
-
Acrylic craft paint
-
Craft paint brushes
-
Thin gauge soft wire (we used 26 gauge) in your desired finish. Sturdy cord or twine is also an option.
-
Thicker gauge wire for hanging (optional, depending on weight of finished hanging)
-
Long nose pliers
-
Tree branch/stick or wood dowel (length depends on desired size of hanging)
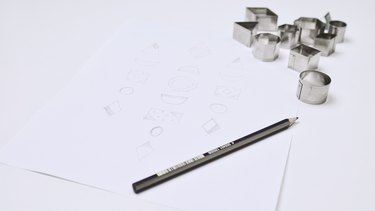
Step 1: Plan Your Design
Technically, this step is optional, but things will go a lot smoother if you don't skip it. Designing beforehand lets you plan out the exact type and amount of pieces you'll need for your hanging, so we encourage you to sketch out your complete design before diving in (see tip below for design and pattern inspiration). However, if you're the type who loves to design on the fly, by all means, go for it. We, on the other hand, chose not to chance it!
Tip
Polymer clay hangings are pretty much jewelry for your walls, right? So in addition to seeking out other clay wall art designs for inspiration, make sure to check out images of dangly geometric statement earrings and necklaces for more design ideas.
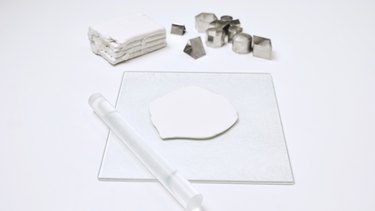
Step 2: Roll Out Clay
Using your acrylic roller, take a 2-inch sized ball of polymer clay and roll it out to about a quarter-inch thickness (see tip below).
Tip
Most clay needs to be conditioned in order to make it more pliable and/or less crumbly. The older the block of clay, the more conditioning it will need. To do so, simply roll out the same piece of clay repeatedly while occasionally kneading it with the heels of your hands. The warmth of your hands helps to soften hardened clay. Continue rolling and kneading until it's supple and no longer crumbles.
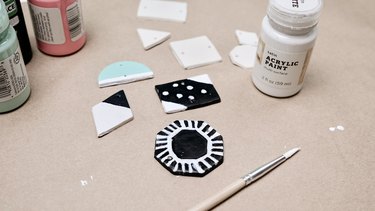
Step 3: Cut Shapes
Once your clay is rolled out, cut out as many shapes as your rolled-out piece allows. Continue until all required pieces are cut. We HIGHLY recommend that you create at least two of each required piece in case any break along the way. Trust us, it's not much extra work, and you'll be glad you did!
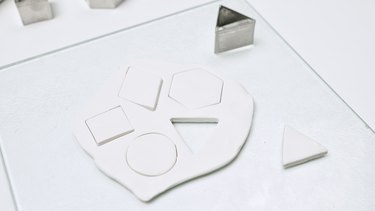
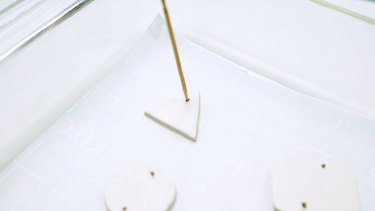
Place pieces on a glass baking dish (lined with parchment or foil if you also use this dish for food (see the tip in Step 4 below) or upon a glazed ceramic tile. Use a toothpick or a similar tool to poke a hole at the top and bottom of the piece as shown — or just a hole at the top of the piece if it will be the bottom piece of a strand.
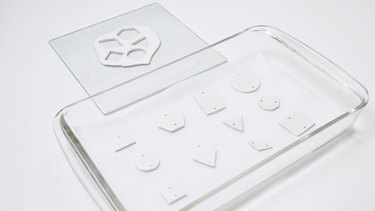
Step 4: Bake Clay
Bake clay pieces according to the manufacturer's instructions. Typically, polymer clay is baked at around 275 – 300 degrees F (135 – 149 Celsius) for 15 – 30 minutes, depending on the thickness. A quarter inch of thickness will need about 15 – 20 minutes baking time. (See tip box below.) Allow baked pieces to fully cool before moving on to the next step.
Tip
For more information about the particular polymer clay we used, please visit the Sculpey FAQ page. Note that different brands of polymer clay have different formulas, so for detailed baking guides and safety considerations, please refer to the product manufacturer's instructions.
Step 5: Paint
If you used pre-colored clay and you prefer solid-colored shapes, then you can skip this step. If you'd like to get a bit more craftsy, then bust out your paint brushes and go to town!
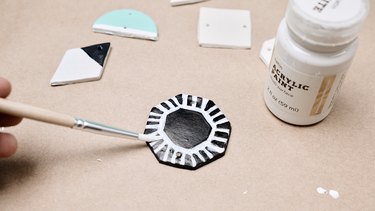
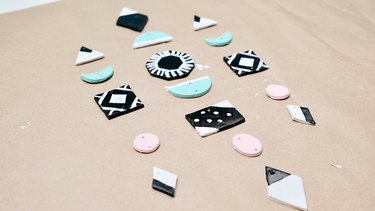
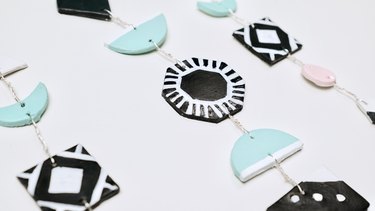
To keep things simple, we used a limited-color palette and decorated the pieces with eye-catching yet easy-to-freehand designs like sunbursts, color blocks, imperfect lines, and dots. A monochromatic color palette would also be really chic. Above all, have fun, and go wherever your design sensibilities lead!
Lay out all painted pieces according to your design and allow to dry completely before proceeding to the next step.
Step 6: Assemble Pieces Into Strands
Now you'll create the individual strands for your wall hanging by connecting pieces with wire (as we did) or tying them together with sturdy cord such as nylon or twine. We chose wire to add a metallic element to our design, as well as for its inherent strength. Plus, you won't have to worry about tying knots that may come undone. However, unless you're a wire-working pro with the right tools at your disposal (which is not us) be aware that using wire will yield a wavy and stiff rather than straight and dangly strand. We like the organic feel this imperfect waviness lends, as it complements the raw wood of the tree branch and folksy hand-painted designs. However, if you'd like cleaner lines and an articulated hanging, tie your pieces together using cord.
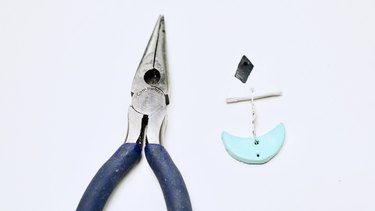
If using wire, cut a 3-inch piece and insert it about 1 inch into the topmost piece of your first strand, then bend into a hook as shown.
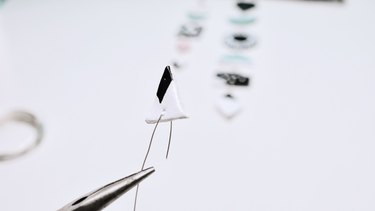
Twist the wire ends together to connect them and secure the polymer clay piece to it. Be careful while twisting! Twist only the wire and, though you may be tempted, DO NOT hold onto the clay piece to use as a handle for twisting. This strain will almost assuredly break your polymer clay piece.
Once you've twisted the end of the wire around itself, insert the opposite end into the next piece of clay in your strand and twist the wire in the same way as you did the first.
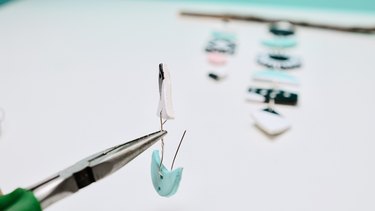
The first two pieces of your strand are connected.
Continue connecting pieces the same way until all strands of your design are complete.
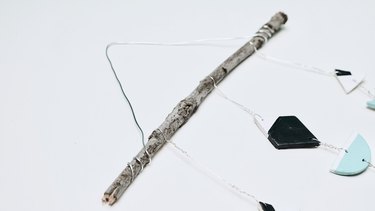
Step 7: Connect Strands to Branch (or Dowel)
Cut a piece of wire long enough to give you the desired length of wire between the first clay piece on the strand and the branch, adding about 4 inches extra for fastening. Connect one end of the wire to the first clay piece of the strand as you did in Step 6. Similarly, connect the other end to the branch by looping it around the branch (or dowel for a more finished/clean look) and then twisting it around itself as shown. The first strand is fastened.

Connect all strands along the branch where desired.
Step 8: Connect Hanging Wire or Cord
Finally, take a piece of wire or cord approximately 24-inches (we used thicker, 20 gauge wire for added strength) and wrap (or tie) it around both ends of the branch allowing you to hang up your handiwork.
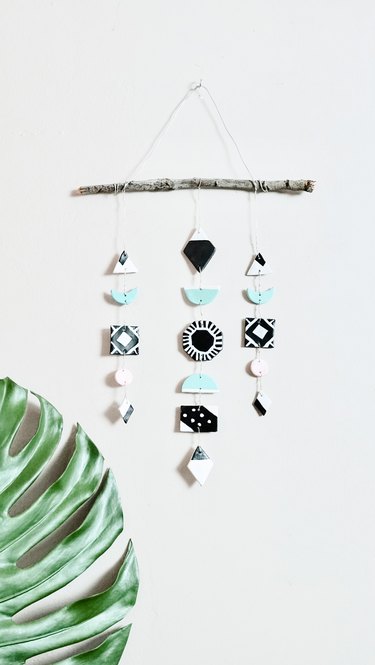
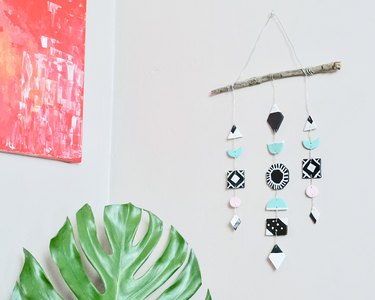
All done and ready to hang!
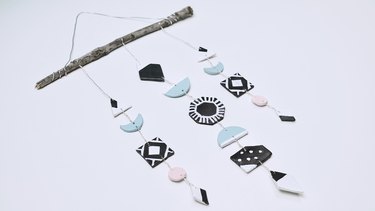
Step back and take a moment to appreciate your gorgeous polymer clay masterpiece. That's right — take all the time you need.

