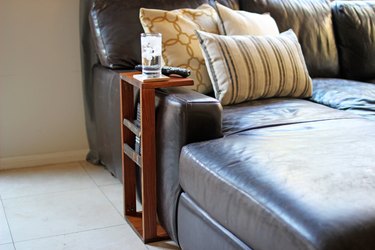
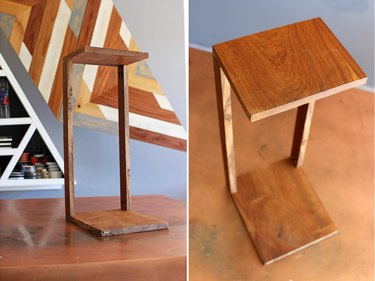
We are always spending quality time on the couch, whether it be watching a movie, pulling out a board game or simply eating dinner somewhere cozy. My bulldog trashed my side tables so the last resort was crowding together on the ottoman–not ideal at all. However, I recently found the perfect solution with this DIY couch arm table that's simple to make!
Video of the Day
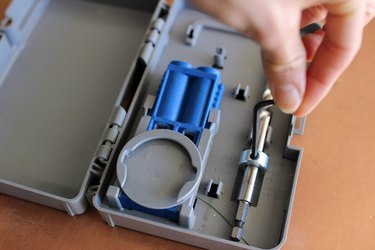
Things You’ll Need
-
Table saw or hand saw
-
Pencil
-
Measuring tape
-
Kreg Jig
-
Pocket hole screws (length depends on your width of wood)
-
Wood glue
-
Sandpaper
-
Wood
Tip
Please note: Adjust the measurements (height/width) to tailor it to your couch!

Step 1: Measure Couch Arm
Measure the height of your couch arm.
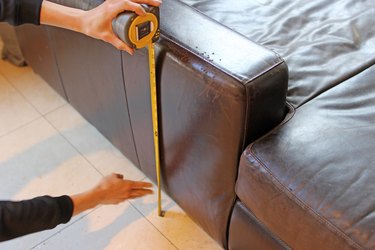
Measure the width of your arm to determine the width of your table.
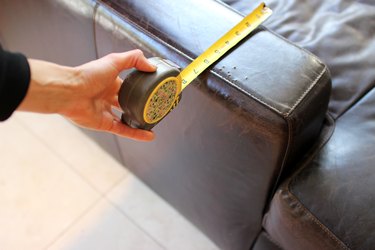
Measure the length on your arm for the length you like your table to be.
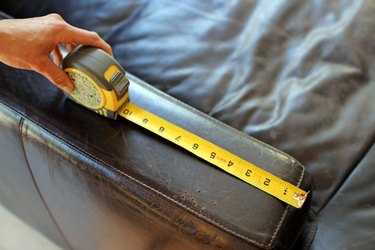
Once you have all measurements, add them to a sketch. You want to make sure you can slide your table on top of your couch arm, so be sure to add an inch or two to this section to ensure it will fit right over.
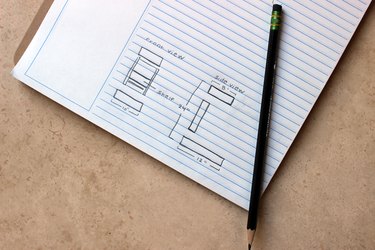
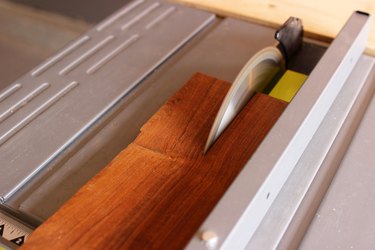
Step 2: Cut Your Wood
Using a table saw, cut your wood to the measurements you noted in your sketch. I am using scrap wood from previous projects! I didn't spend a dime on this DIY–what a bonus!? My cuts broke down into the following measurements:
- Table base – 8" x 12"
- Table legs – 33 1/4" x 2 " wide (the total height of the table will be 24")
- Table top – 8" x 10"
- Shelf add-on (optional)
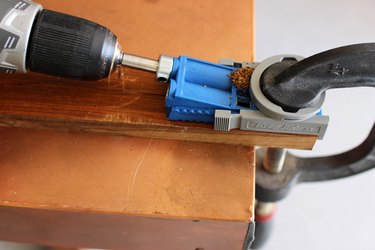
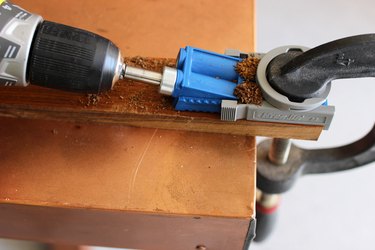
Step 3: Drill Your Holes
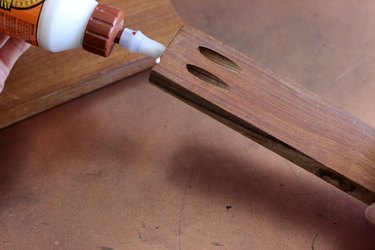
Once all the pieces are cut, I used my Kreg Jig to drill pocket holes into the ends of each of the legs. Measure the thickness of your wood to determine how to set up your jig.

Adjust the Kreg Jig on the back to that measurement. You will see two arrows. Slide the grey pieces up until it's the proper measurement.
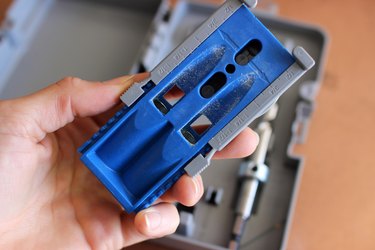
Be sure to adjust the drill bit to the thickness, as well.
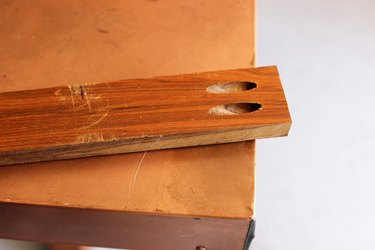
Once your bit and Kreg jig are adjusted, clamp down your wood and drill the holes into the designated slots.
You should have two on each side of the skinnier leg pieces that look like this!
Step 4: Assemble
Place the legs right across from one another on the 8-inch side (or whatever your smaller side of the base piece measures). Add wood glue to the end of one of the legs.
Grab the correct length screws and screw them in with the drill bit provided with your Kreg Jig.
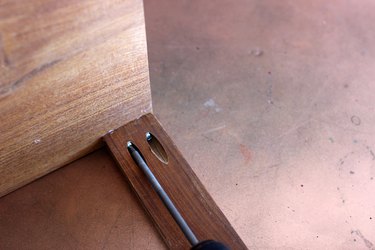
Repeat this process to attach each leg to the top and bottom pieces.
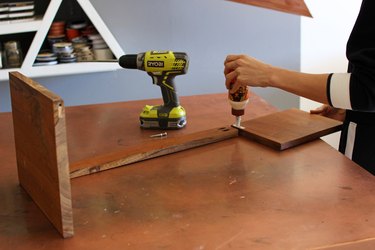
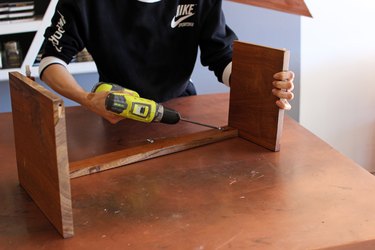
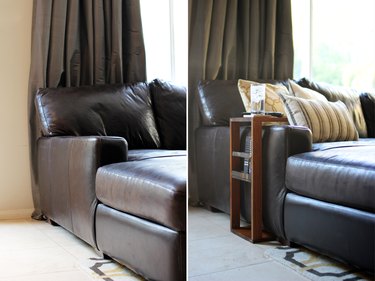
After you screw in both of your legs, you should have something that looks like this! You can leave it as is or add a shelf to hold your remotes.
Add a Shelf
If you decided to take things further and add the shelf, follow these steps!
Things You’ll Need
-
Nail gun
-
Appropriate nail length depending on your thickness of wood (mine where 3/4")
-
Wood stain
-
Paint
-
Paint brushes
-
Wood pieces cut down:
- (1) 2 ” x 8.5 “
- (4) 1 ” x 8.5 ” to fit snuggly between the legs as the bottom of the shelf
-
(1) 2 " x 8.5 "
-
(4) 1 " x 8.5 " to fit snuggly between the legs as the bottom of the shelf
Step 1: Sand Wood
Sand your shelf pieces down.

Step 2: Stain Wood
Stain the pieces of wood a darker color depending on your personal preference.

Step 3: Assemble Shelf
Add your bottom shelf piece where you think it looks best. This time you can use a nail gun since it will not need to hold a lot of weight!

Place a skinnier piece right on top of the base of the shelf and nail gun that together from the bottom of the shelf, then in from the sides.

Repeat with another piece on the other side and space the remaining two pieces a little bit above that in order to hold theremotes properly. Mine was able to fit two remotes nicely.

Step 4: Put It to Use!
The convenience of this thing is a dream! Sit back and relax with your snack or drink at your fingertips.

I am off to make a pair for every couch in our house. By switching the paint color, shelf placement or even adding a slit for a wine glass, every DIY couch arm you make will serve a purpose with a unique personal touch. Happy DIY'ing!


