Driftwood is a gorgeous natural resource that can really get your creative juices flowing. Even sitting unadorned in a glass bowl, driftwood makes a beautiful home accent. But as raw material to create wall art, the possibilities are endless. Of course, given driftwood's oceanic origins, it seems the most appropriate to transform it into art depicting aquatic creatures. Whether you create a fish, seahorse or turtle, you'll be the big kahuna of creativity.
Video of the Day
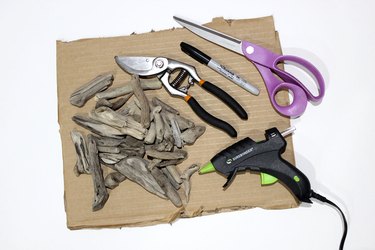
Things You’ll Need
-
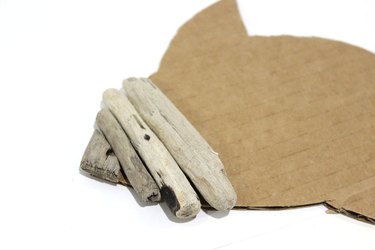
Cardboard
-
Pen
-
Scissors
-
Driftwood
-
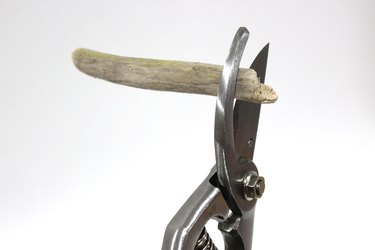
Pruning shears
-
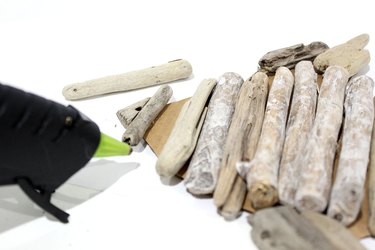
Hot glue
Making a Driftwood Fish
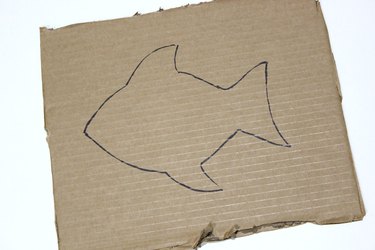
Step 1: Cut Out a Fish Shape
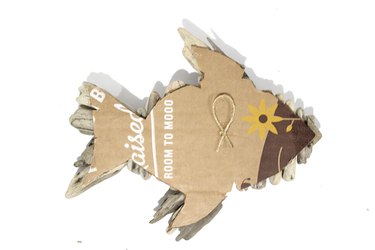
Draw a fish shape on a piece of cardboard. It does not need to be anatomically correct. Just remember to include the fins and tail. Instead of buying a new piece of cardboard, recycle an old box.
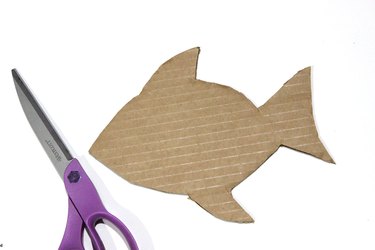
Cut out the shape of the fish with scissors. This piece of cardboard will be the base of the wall art. Cardboard provides a rigid structure for the art, and the light brown color will blend in nicely with the driftwood.
Step 2: Arrange the Driftwood
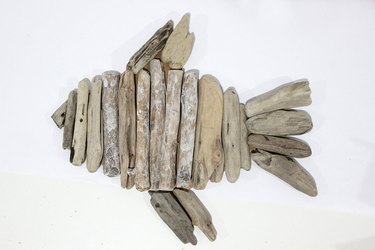
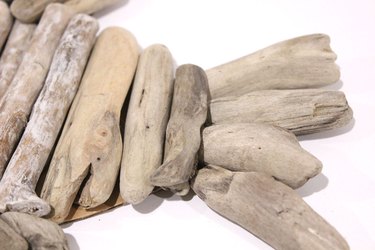
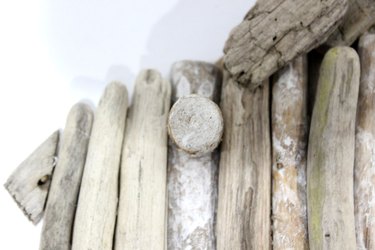
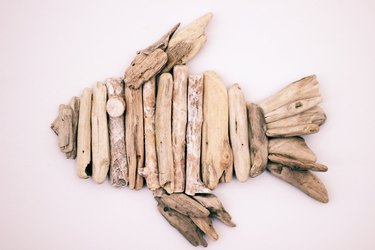
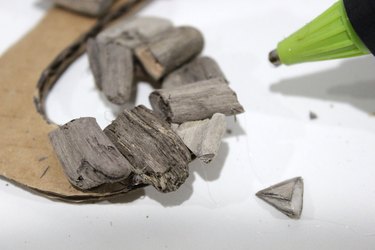
Arrange pieces of driftwood on top of the cardboard shape to fill it up. At this point, you're not gluing them on, but mixing and matching different pieces to see where they should go. For the fish, I like to line up the wood pieces vertically along the body.
If you can't find the perfect size piece of wood to fit in a specific place, trim a piece with some pruning shears.
Keep going until the entire shape is filled in.
Tip
If you don't live near the beach, you can purchase driftwood from online merchants. They sell very affordable driftwood in bulk in various sizes.
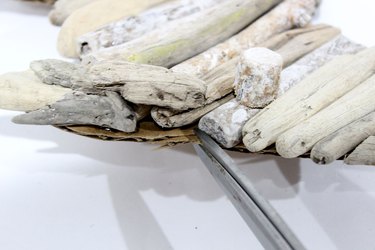
Step 3: Glue the Wood to the Cardboard
Once you have the wood pieces where you'd like them, hot glue the individual pieces one at a time to the cardboard. Leave all the pieces on the cardboard in their chosen positions until you glue each in place.
Step 4: Attach the Fins
As you glue the wood pieces for the fins, you might notice that they don't press up against the main body perfectly, revealing gaps in the cardboard. This is easily remedied by overlapping additional driftwood pieces on top of the original fin pieces to cover any gaps.
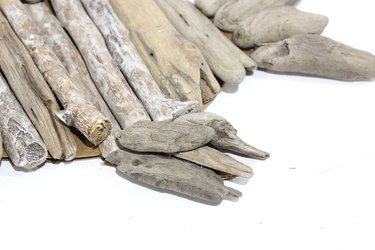
Step 5: Attach the Tail
Likewise, as you glue the tail pieces on the cardboard, you might see gaps showing cardboard because of the angled nature of the tail. Just overlap additional pieces on top to hide the gaps.
Step 6: Add the Eye
With the pruning shears, cut a small round segment from one of the driftwood pieces. Glue this piece on the fish to create the eye.
Step 7: Trim Any Excess Cardboard
After you're finished, there may still be cardboard extending past the edge of the fish. You can either leave it or just trim the excess with scissors.
Step 8: Include a Hanging Loop
To hang the fish wall art, hot glue a piece of string in a loop on the back. Be sure to position this loop at the weighted center of the fish so it hangs straight. And it is clearly by accident that I had recycled a box that when cut up for this project revealed an image of a fish on the back complete with a flower for the eye and a smile!
Instead of a hanging loop, you can also install the driftwood wall art with double-sided mounting tape. Using mounting tape allows the art to sit flat against the wall.
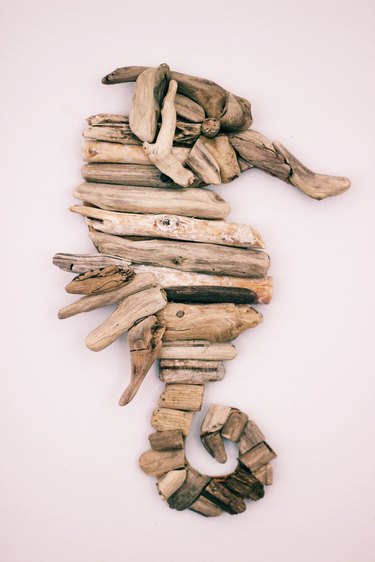
Making a Driftwood Seahorse
Step 1
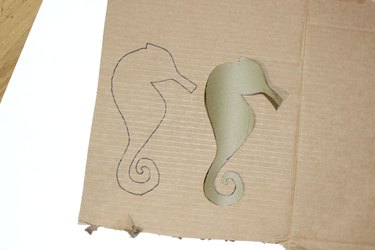
To create a seahorse out of driftwood, the process is the same, with a few variations. Because it's more difficult to draw a seahorse than a fish, practice a few times on a piece of paper, and then use the seahorse you drew on paper as a template for the cardboard.
Step 2
The driftwood pieces should be arranged horizontally to mimic the rings of a seahorse. And because of the narrow nature of the tail, you'll need to cut smaller sections of driftwood for it.
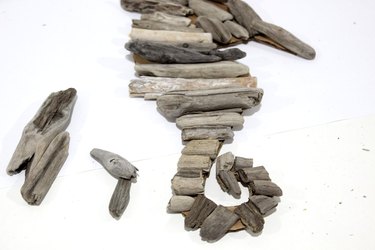
There will be a lot of cardboard gaps showing in the tail because of the curvature. Just cut little pieces of driftwood to conceal them.
Overlap a few driftwood pieces on the head to approximate the gill opening and eye. Glue additional pieces to the seahorse's back for the dorsal fin. And that little bit sticking out at the back of the head? That's the coronet (we're learning so much about seahorses today!).
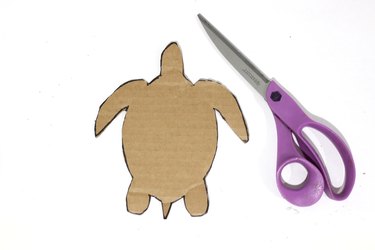
Making a Driftwood Turtle
Step 1
Like the seahorse, practice drawing the turtle on paper, and use your paper drawing as a template for the cardboard. A turtle shape looks a lot like a rotisserie chicken standing up.
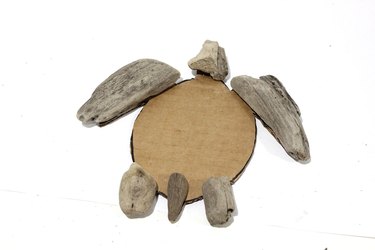
Step 2
When attaching the driftwood pieces, glue on the head, feet, flippers and tail first so the subsequent pieces that comprise the shell will lie on top of them.
Step 3
Then overlap driftwood in a circular pattern on top of the bottom pieces. Keep adding driftwood until there is a slight dome effect.

Add a couple of eyes and some horizontal ridges on top of the shell.

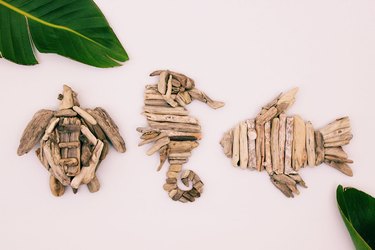
Hang all three pieces of wall art in a set for a great beachy vibe. And get ready to catch the waves of admiration.


