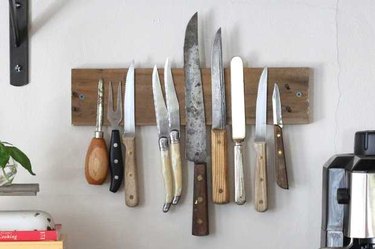
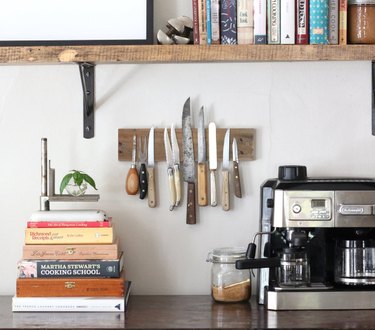
Not only is an exposed magnetic knife rack useful for maximizing vertical storage space and providing easy access to kitchen tools in high rotation, but it adds an appealing visual element. Try this easy DIY using reclaimed wood to make your very own.
Video of the Day
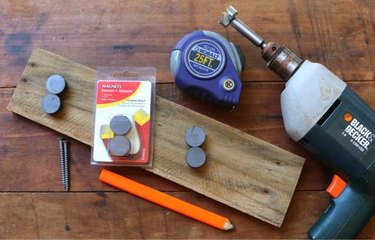
Things You’ll Need
-
Wood board, 15 inches by 3½ inches
-
Sandpaper
-
Tape measure
-
Trigger clamps, optional
-
Power drill
-
1-inch round Forstner bit
-
1-inch round ceramic magnets, 54
-
Gel adhesive
-
Drill bit, 5/32
-
2½-inch wall mounting screws, 2
Warning
Although a magnetic knife rack provides a beautiful addition to any kitchen decor, safety is key. Remember to use caution when displaying and handling exposed knives and kitchen tools, keeping far away from the reach of children and pets.
Step 1
Begin by measuring and cutting the wood board to the desired size for the space where it'll eventually be displayed. We had an empty space of wall in our kitchen where a 15-inch board would work perfectly, so that's the size we went with for this tutorial.
Tip
Most hardware stores will cut wood to any size you like for no additional charge.
Step 2
Clean and sand the wood board to the desired finish. We were going for an overall rustic feel, so we left our wood exposed after giving a rough sanding. If you like a more modern finish, this is the time to apply stain and sealer. Decide which side of the board you'd like the surface to be, and then turn over to measure out where you'll drill for inlaying the magnets.
Step 3
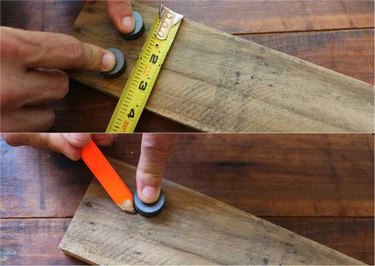
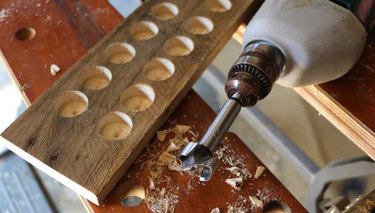
Allow 1 inch on each end of the board for drilling the wall screws into, and then mark two straight lines, 2½ inches apart, to lay out two rows of magnets. On each of the lines, mark nine points that are 1½ inches apart to use as a central guide for where to drill and start the holes (the goal is to have two central rows of nine magnet holes that measure ½ inch apart).
Step 4
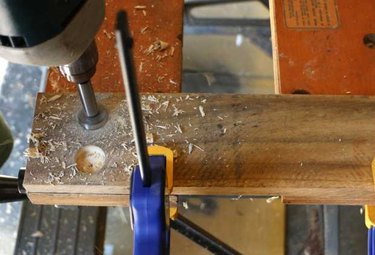
To inlay the magnets along the backside of the wood board, use a Forstner drill bit. This type of bit drills a solid round well into the wood, allowing control over how deep of a hole you need. It can be found in the power-tool section of most hardware stores.
Step 5
Using coordinating diameters (1-inch Forstner bit with 1-inch magnets) creates a perfectly sized hole to drop the magnets into. The key to a strong magnetic hold is fitting the magnets as close to the front of the wood surface as possible, so you'll want to drill into the wood as far as you can without breaking through the surface.
Tip
In lieu of eyeballing where to stop drilling to avoid breaking through the wood’s front surface, wrap a layer of painter’s tape around the bit to mark the stopping point during the drilling process.
Step 6
Use trigger clamps to hold the wood in place to allow for more overall control during this step. We drilled the 18 marked holes (two rows of nine) as close to the surface as possible, leaving ⅛ inch of wood where the magnets would sit.
Step 7
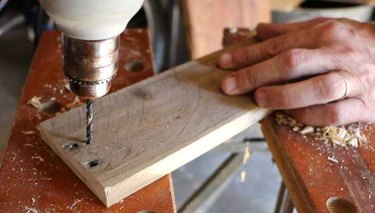
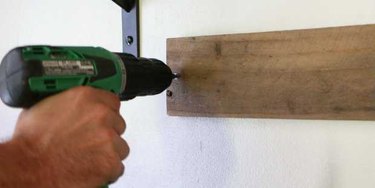
Next, drill a central hole on either end of the board as starters for where the wall mounting screws will go.
Step 8
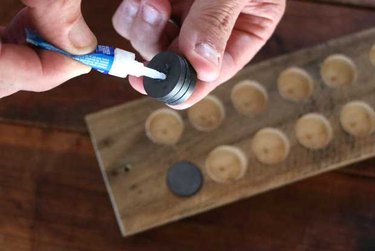
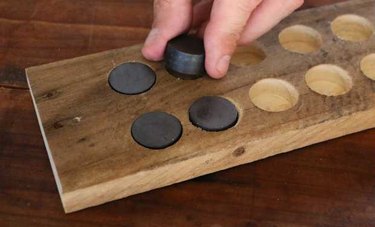
For the strongest hold, stack three 1-inch round ceramic magnets together (two or more magnets stacked together will behave exactly like a single magnet of the combined size). Then inlay those "stacks" along the two rows of drilled holes along the backside of the board with a small amount of adhesive gel for a secure bond. A multi-surface bonding super glue goes on thin and dries quickly, perfect for this type of project. For the 18 wells, we used 54 single magnets, which might sound like a lot, but they come in packs of six at just under $2 a pack, so the total magnet cost was right around $18 for this project.
Step 9
Using the 2½-inch wall mounting screws, mount the magnetic rack in place on your wall and start displaying your favorite knives.

