eHow may earn compensation through affiliate links in this article.
Sure, receiving flowers is nice. But nothing makes a heart go pitter-patter like a bouquet of rose cupcakes. It looks just like a real floral arrangement, but with a major difference — you can eat it. With this bouquet, you don't have to worry about how to keep it fresh in water. All you have to decide is who you're going to share the cupcakes with. This bouquet would be perfect for Valentine's Day and Mother's Day, as well as a centerpiece for showers and birthday parties. It will definitely make the occasion that much sweeter.
Video of the Day

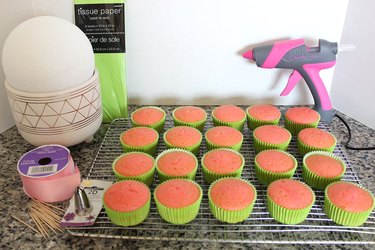
Things You’ll Need
-
Cupcakes
-
Icing
-
Gel icing color
-
2D piping tip
-
Piping bag
-
Styrofoam ball, 5 or 6-inch diameter
-
Green tissue paper
-
Planter
-
Ribbon
-
Hot glue
-
Toothpicks
-
Double-sided tape
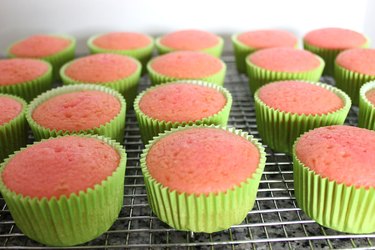
Step 1: Bake Cupcakes
Bake cupcakes, either from scratch or with a box mix. I used a strawberry cake box mix, as the pink cake was a perfect backdrop for the roses. I also baked them in green liners that coordinated with the green tissue paper. For this project, I needed about 20 cupcakes.
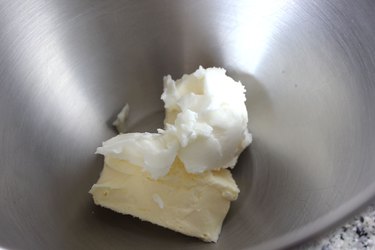
Step 2: Prepare Icing
Instead of store-bought icing, I recommend making your own buttercream frosting because it works better in a piping bag. The recipe I use calls for one stick of unsalted butter and a half cup of vegetable shortening, blended in a mixer at medium speed for three minutes. I like adding the shortening instead of using all butter because it holds up better in warmer temperatures, and it hardens much better than icing with butter alone.
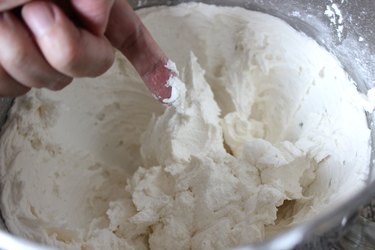
Sift four cups of confectioner's sugar, and add it in small batches to the butter and shortening mix. Add one to two teaspoons of vanilla extract and a pinch of salt. Test the consistency of the icing with your fingertip. If you touch the icing and it doesn't stick to your finger, it's too dry — add a tablespoon of water. I use water instead of cream so I can leave it out unrefrigerated. Test the icing again. A little bit of it should stick to your finger when you touch it. Add water a teaspoon at a time until it's the right consistency. This recipe will ice approximately 24 cupcakes.
Step 3: Color the Icing
Using the tip of a toothpick, add a few drops of gel icing color to your icing and mix with a spoon. I used pink icing color. Gel icing color is very concentrated, so you don't need a lot of it.
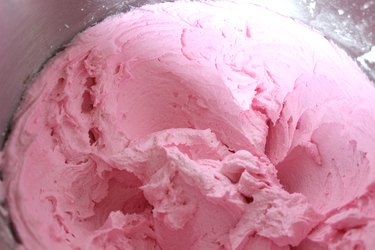
I wanted my roses to have two shades of pink to give them more depth. To achieve this effect, spoon a little of the pink icing into a small bowl, add additional icing color and mix.

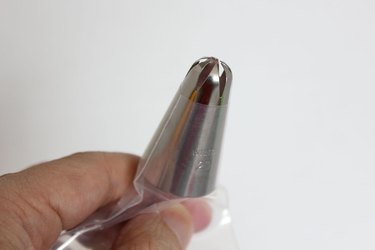
Step 4: Prepare the Piping Bag
To pipe the roses, you will need a #2D piping tip. The tip looks like a star with the points curved inward. Slide the tip into a piping bag. Cut about an inch at the tip of the bag, and push the tip through the opening until it stops.
Spread the darker pink icing along the sides of the bag.

Spoon the lighter pink icing into the middle of the piping bag. It helps to place the piping bag in a glass to hold it steady as you fill it with icing.

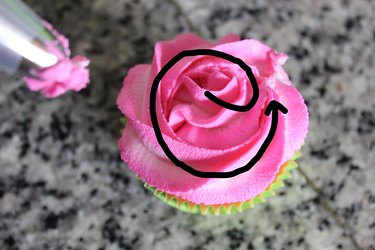
Step 5: Pipe the Roses
Even if you've never piped roses from icing before, don't worry. The piping tip does all the work for you. Twist the top of the piping bag to seal it shut, and squeeze the bag to push icing through the tip. Squeeze a little bit of icing onto a plate until the two shades of pink appear. Then place the tip over the middle of the cupcake and squeeze the bag firmly. In one continuous motion, squeeze the bag slowly in a counterclockwise motion, going from the middle to the outside. Think of it like writing a lower case "e."
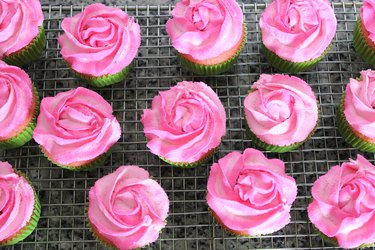
After you've piped all your roses, place them in the refrigerator for about 15 minutes to allow the icing to "crust" or harden. This way, if you accidentally touch the icing, the rose holds its shape.
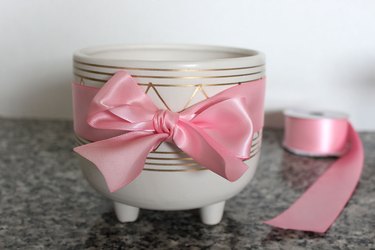
Step 6: Tie a Ribbon
Select a planter with an opening of between five and six inches to accommodate the foam ball. Tie a ribbon around the planter that picks up the color of the roses.
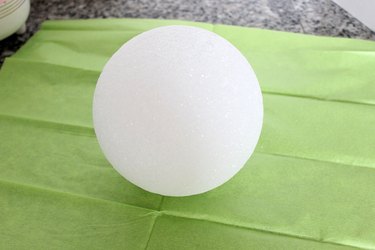
Step 7: Prepare the Foam Ball
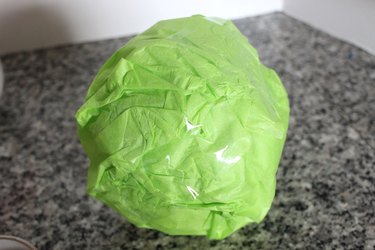
Wrap the styrofoam ball in green tissue paper. While the tissue paper provides a green background for the cupcakes, it also serves a more practical purpose. Styrofoam often sheds particles, and the paper keeps the particles away from your cupcakes.
Tape the ends of the tissue paper. Yes, it will look like a head of lettuce.
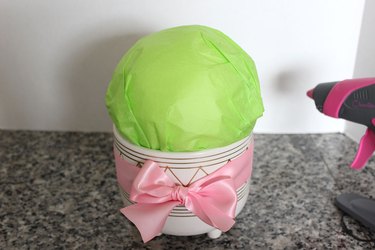
Apply some hot glue to the rim of the planter and press the foam ball into it.
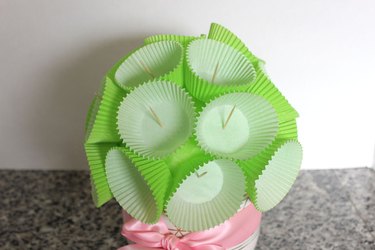
Step 8: Create a Cupcake Template
To help you position your cupcakes onto the foam ball, create a template first so you can decide where you will place them. Arrange empty cupcake liners around the ball, securing them in place by inserting a toothpick in the middle of each one.
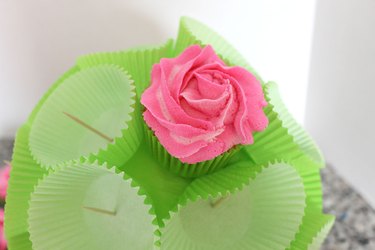
Step 9: Insert Rose Cupcakes
Starting at the top, remove the cupcake liner, leaving the toothpick in place.
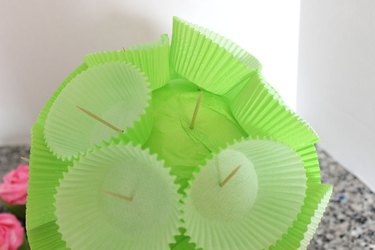
Push the cupcake through the toothpick to hold it in place. Continue removing empty cupcake liners and replacing them with finished rose cupcakes.
When you get to the cupcakes toward the bottom that face out, you will need reinforcements so they do not fall off. Add a second toothpick next to the original toothpick; they should both point upward.
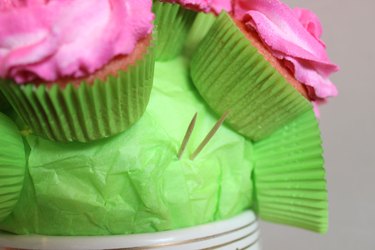
When you're done inserting all the cupcakes, you'll notice that even though they are butted up against each other, there is still a lot of space between them. We will be filling in these gaps in the next step.

Step 10: Fill Gaps
Cut four-inch squares of tissue paper. Stack three squares, fanning them out.

Wrap the tissue paper around the eraser end of a pencil. Place a piece of double-sided tape on the end.

Use the pencil as a handle to push the tissue paper into all the gaps. The double-sided tape will hold the paper in place. The tissue paper mimics leaves and gives the bouquet a finished look.

Real roses don't last that long, and these rose cupcakes will disappear even quicker!


