Things You’ll Need
-
2 large wood slices
-
1 medium wood slice
-
1 small wood slice
-
Assorted wood blocks
-
Small wooden spools
-
Small wooden buckets
-
1/4-inch square dowels
-
1/4-inch round dowels
-
3/8-inch round dowels
-
1-inch wood rounds
-
Small eye screws
-
1/4-inch glue pins
-
Wood glue
-
Small birdhouse
-
Twine
-
1/4-inch drill bit
-
1/8-inch drill bit
-
Craft knife
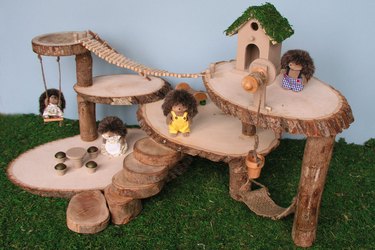 Miniature Treehouse Image Credit: Debbie Williams
What child hasn't dreamed of playing in an elaborate tree house in the backyard? Maybe a full-sized wonderland is beyond your resources, but this miniature version is an easy compromise. Using readily available supplies and tools, you can create a playland to stimulate imagination and creativity in your child.
Video of the Day
Step 1
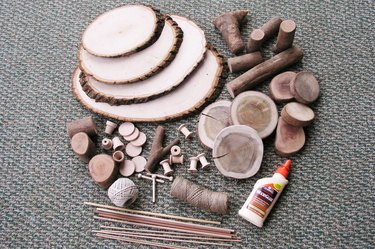 Treehouse Supplies Image Credit: Debbie Williams
Most craft supply stores will carry balsa wood slices in various sizes, as well as the assorted small wooden parts needed. Kiln-dried tree blocks can be found on several websites or you could cut and dry the blocks yourself. (It is important to use dried wood because freshly cut green wood will crack.)
Step 2
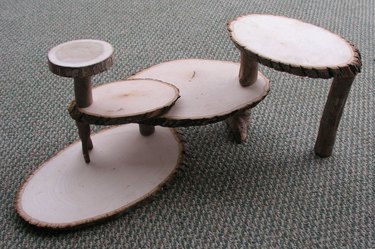 Plan the Layout Image Credit: Debbie Williams
Plan your design. Lay out the slices and blocks, trying them in different positions until you like the result. Vary the heights and angles to create different activity areas.
Step 3
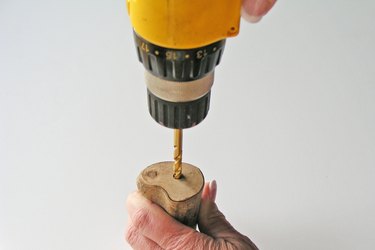 Drill Holes for Dowels Image Credit: Debbie Williams
Because you can't glue end grain wood to other pieces of end grain wood, you need to join pieces with glue pins. At each joining point, drill a 1/4-inch hole in both surfaces. Do not drill completely through the slice. (Clamp small pieces in a vice for safety and hold larger pieces securely when drilling.)
Step 4
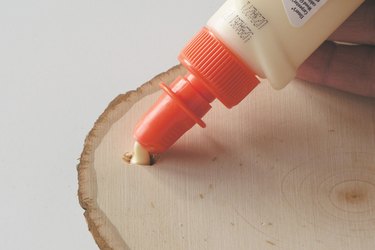 Glue Image Credit: Debbie Williams
Dry fit the glue pegs into the holes and check the connections for a tight fit. Trim the glue pins if necessary. Ready all joints before beginning the gluing process. Fill the hole with wood glue.
Step 5
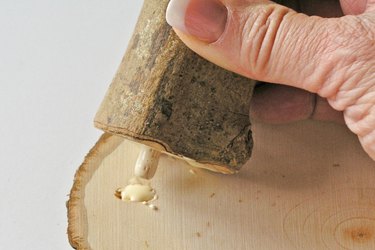 Join Pieces Image Credit: Debbie Williams
Insert the glue pin into one piece and cover the flat surface with glue as well. Press the two pieces together and clamp or add weight to secure the joint. Wait until completely dry (several hours) before proceeding. Continue with each joining point until complete.
Step 6
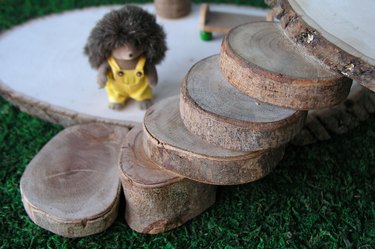 Steps Image Credit: Debbie Williams
You'll need several ways for dolls to climb between levels of the tree house. Plan your route and use different methods for each level. Lay wood slices in overlapping tiers to look like stairs, joining them with dowels or glue pins.
Step 7
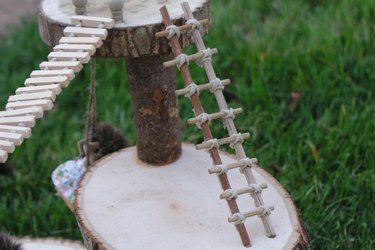 Ladder Image Credit: Debbie Williams
Build a ladder by cutting notches in two 1/4-inch dowels and tying rungs, cut from 3/8-inch dowels, between them with twine.
Step 8
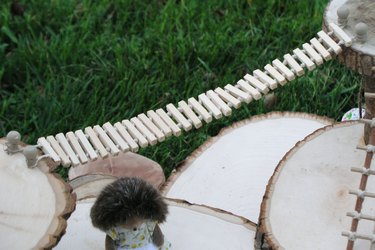 Swinging Bridge Image Credit: Debbie Williams
A swinging bridge is a must! Cut 1/4-inch square dowels into pieces about 1 inch long. (A saw blade or a craft knife is an ideal tool for this.) Drill 1/8-inch holes in each piece about 3/8 inch from each end. (A handheld rotary tool works well.) Thread separate long pieces of twine through each hole of the square dowel section. Tie a knot in each piece of twine and thread another dowel. Continue until the bridge reaches its destination.
Step 9
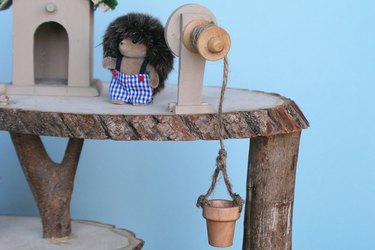 Bucket Lift Image Credit: Debbie Williams
To make the bucket lift, start with the stand. Cut a small rectangle of craft wood and two small pieces from the 1/4-inch square dowels. Drill a 3/8-inch hole in the rectangle, then glue it between the dowels, which act as legs for the stand. When the glue is dry, glue the assembly to the wood-slice platform. Mount the spool to the stand with an axle peg. Drill a 3/8-inch hole in a round wooden disk and glue it to the back of the axle peg to hold the spool in place and serve as the turning wheel. Drill holes on each side of a small wooden flower pot. Thread a small piece of twine through each hole and tie a knot, creating a "handle." Tie another piece of twine to the handle and wind the other end around the wooden spool.
Step 10
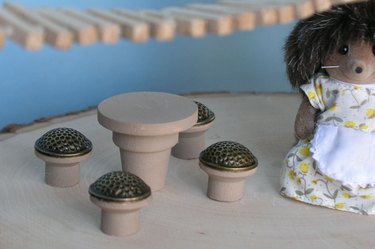 Table and Stools Image Credit: Debbie Williams
Glue a round wooden disk to the top of a wooden flower pot to make a table. Cut small wooden spools in half and top them with buttons to make stools.
Step 11
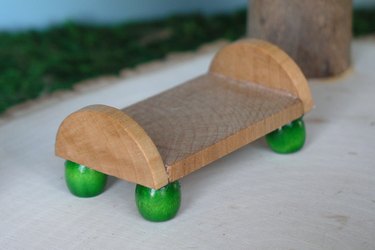 Bed Image Credit: Debbie Williams
Make a bed by cutting a wooden disk in half and gluing each half to a piece of craft wood. Glue wooden beads in place for the feet.
Step 12
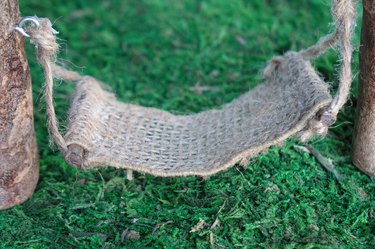 Hammock Image Credit: Debbie Williams
To make the hammock, cut two pieces of small round dowels about 2 inches long. Drill holes in each end. Wrap a piece of burlap ribbon around each dowel and glue in place. Put small eye screws into place between uprights. Thread twine through the holes in the dowels and tie the hammock to the eye screws.
Step 13
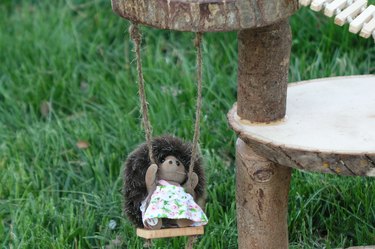 Swing Image Credit: Debbie Williams
To make the swing, drill small holes in each side of a small piece of craft wood. Place eye screws on the underside of one of the wooden slices. Thread a piece of twine through each hole in the craft wood, tie a knot on the bottom side and tie up to the eye screws.
Step 14
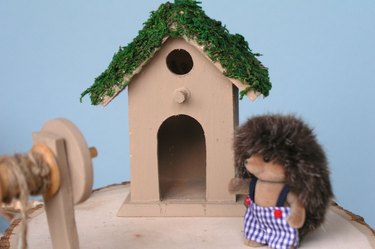 Clubhouse Image Credit: Debbie Williams
Cut a door out of a small birdhouse. Glue moss to the roof for an added natural look, creating a cute "clubhouse" for dolls.
Step 15
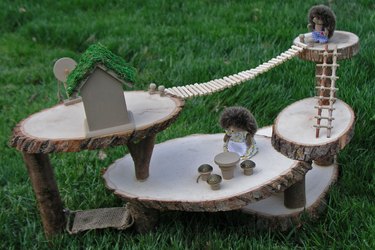 Back View Image Credit: Debbie Williams
Use your imagination to add your own special touches to the miniature tree house.

